Food Buzz Badge

Wednesday, June 20, 2012

We're Having a Heat Wave

I grew up in Nebraska, where it was not unusual for it to reach 100 degrees in the summer.  There's a song my mother used to sing:  "We're having a heat wave, a tropical heat wave."  Anyone know that song?

Flash forward twenty years, where it hit 75 degrees in Anchorage on Sunday night and the air was thick and humid in preparation for some serious rain.  Mosquitoes swirled about the yard and David and I started to complain about how hot it was.  So what did we decide to do?  Run the oven cleaner.  The temperature on the lower level of the house rose another ten degrees.  (In my defense, I'm not a total whiner.  This inability to handle heat happens to everyone who moves to Alaska.  I lived in New Orleans for four years, and I once lived in an apartment in St. Paul, Minnesota with no air conditioning and the temperature regularly hit 95-100 that summer).

So of course I decided to frost a cake.  Seriously intelligent move.  I had to move the cake out of the kitchen to prevent frosting from melting down its sides.

I'm back on schedule with the Cake Slice group this month, after having been on vacation for May's cake pick.  In the interest of full disclosure, this cake should have a layer of pudding between the two layers.  This pudding, logically enough, required heavy cream.  And here is the joy of living in Alaska:  the large, normally decently-stocked grocery store near my home had no heavy cream on Sunday afternoon.  Zip.  None.  Nada.  So I doubled the frosting and skipped the pudding.

Omitting that step saved a lot of time, and judging from the comments of some of my fellow bakers, some serious angst;  apparently it was hard to keep the layers from sliding when the pudding was sandwiched between them.

This version requires less than an hour of active time, and is seriously, deeply chocolatey, not too sweet and with just a hint of coffee.   Even though I'm not much of a chocolate person (gasp!), I loved it. 

Brooklyn Blackout Cake
Adapted from The Cake Book by Tish Boyle

For the cake:
1 1/2 cups all-purpose flour
1 cup dark cocoa powder
1 1/2 tsp. baking powder
1 1/2 tsp. baking soda
1 tsp. salt
1 3/4 cups granulated sugar
2 large eggs
1 egg yolk
1 cup buttermilk
1/2 cup unsalted butter, melted
2 tsp. vanilla
1 cup hot brewed coffee (I used a Starbucks Via packet in 8 oz. of hot water--worked like a charm)

For the frosting:
8 oz. unsweetened chocolate, roughly chopped
22(!) tbsp. unsalted butter, softened
3 cups powdered sugar
4 tsp. vanilla

Position a rack in the center of the oven and preheat it to 350 degrees.  Spray two 9-inch cake pans with baking spray with flour and set aside.

Sift together the flour, cocoa, baking powder, baking soda and salt into the bowl of your stand mixer, if you have one, or a large bowl if you're using a hand mixer.  Whisk in the granulated sugar and set the bowl on the stand mixer.


Whisk together the eggs, egg yolk, buttermilk, melted butter and vanilla in a medium bowl.  Put the stand mixer (or hand mixer) on low speed and slowly drizzle the wet ingredients into the coca mixture.  Scrape down the sides of the mixing bowl and ensure that it is well-mixed.  Then add the coffee, mixing until just blended.

Using a spatula, fold the mixture together to ensure that the ingredients on the bottom have been thoroughly mixed in;  when they have, divide the batter between the two cake pans and bake for thirty minutes, or until a toothpick comes out clean.  Cool the cakes on a baking rack while you prepare the frosting. 

Using a double boiler, melt the unsweetened chocolate over simmering water.  When the chocolate is melted, take it off the water and let it cool.

In the interim, using a stand or electric mixer, beat the butter until pale yellow and creamy--don't overbeat.  Add the powdered sugar and beat on medium speed until it is thoroughly combined, scraping down the sides of the bowl at the end.  Then add the chocolate and vanilla, and beat again until combined.

To assemble the cake, tip the cakes out from the cake pans.  You can leave a slight dome on the layer you designate for the top, but using a serrated knife even off the layer that will be on the bottom.  Then slice each layer in two.

Place the lower half of the bottom layer on the serving plate, then cover with a thin layer of the chocolate frosting.  Repeat with the remaining layers, then frost the sides and then the top of the cake, continuing to use the offset spatula. 

Serves 10 to 12, depending on how thickly you slice it.

Monday, June 18, 2012

I Scream, You Scream

When I posted earlier this year that David and I were going to Rome, I received a couple of impassioned pleas to go check out particular foodie haunts.  One reader--I think it was Mike from The Culinary Lens--told me to go visit Gelato di San Crispino.  After a long, hot, jet-lagged day slogging around the Colosseum, Roman Forum and having the gates to the Baths of Caraculla closed on us because we were too late to get in, we decided to cut our losses and go get some gelato.  Smart decision.

Gelato di San Crisipino is tucked away on a tiny side street not terribly far from the Trevi Fountain.  It has a small sign out front, but the best way to locate it is a line of people out the door.  Once inside, there is a list of about twenty flavors, both fruit and cream, all made in-house.  Decide quickly, because the line moves fast and you don't want to be stuck stammering at the counter.

On that hot Monday, I selected zabaione, a cooked custard flavor, and chocolate rum.  David stuck with fruitier flavors, and we trekked up the hill to sit on a set of stairs and eat.  Let me tell you, it is worth the hype.  The flavors are pure and intense, and even the fruit flavors are unbelievably creamy.  It was almost enough to snap us out of our jet lag.  Almost.


That's David's "This is really good" face.
We went back two days later to see if it was as good as we remembered.  It was.

I once read that Alaskans eat more ice cream per capita than any other state in the country.  It seems a little random, but it's true that everyone is happy to see ice cream, particularly when it's homemade.  For a friend's birthday party, I made this gelato-like concoction.  It tastes like the best vanilla malt you've ever had.  Malt powder can be purchased from King Arthur's Flour.

This recipe has a softer consistency.  If you like your gelato firmer, freeze it in smaller containers.

Vanilla Malt Gelato
Adapted from Ben & Jerry's Ice Cream and Dessert Book

4 large eggs
1 1/4 cups granulated sugar
4 cups heavy cream
2 cups 2% milk
2/3 cup malted milk powder
4 tsp. vanilla extract

Whisk the eggs in a large bowl until they are fluffy and pale yellow, then gradually whisk in the sugar.  Pour in the heavy cream and milk and whisk until thoroughly blended.

The gelato was particularly good with a homemade caramel sauce.

Whisk in the malt powder and vanilla, then allow the mixture to sit for 15 minutes.

Pour into an ice-cream freezer and process until it is a soft-serve consistency.  For my freezer, this was about half an hour.

Transfer the gelato to a large storage container and stash in the freezer.

Makes 2 quarts.

Tuesday, June 12, 2012

Wherefore Art Thou, Dinner?

At the rate I'm going, it will be fall before I work through all of the posts related to my vacation.  Plus I promised the kick-ass salad recipe last week.  I seriously don't know where all the time goes.

David and I went to several regions in Italy, but the one we spent the least amount of time in was the Veneto.  This region, in northeastern Italy, is famous mostly for containing Venice, which we skipped this time around because we didn't have enough time to do it justice.  (As an aside, if you ever want to see a truly, atmospherically spooky movie, Netflix Don't Look Now, which stars Donald Sutherland and Julie Christie as a couple vacationing in Venice after losing their young daughter in an accident.  I seriously shrieked out loud at the end.)

Artwork made from recent letters written to Juliet.

The sole place we visited in the Veneto was Verona--the English major in me couldn't resist the opportunity to visit the place where two of Shakespeare's plays were set.  But sorry, Two Gentlemen of Verona, this city is all about Romeo and Juliet.  You can visit Juliet's balcony, Juliet's house and Juliet's tomb--and while the Capulet/Montague feud may have been based on history, you can bet that there was not really a Juliet.  Nevertheless, that doesn't stop throngs of tourists from visiting these attractions, particularly the balcony.

In the courtyard under the balcony, there is a statue of Juliet.  Legend has it that it is good luck to rub her right breast, and we saw lots of people doing it.  We skipped that little attraction and went into the house, which gives you an opportunity to go out on the tiny balcony.  Here's David standing on it, but sadly I couldn't get him to recite the balcony speech to the throngs below.

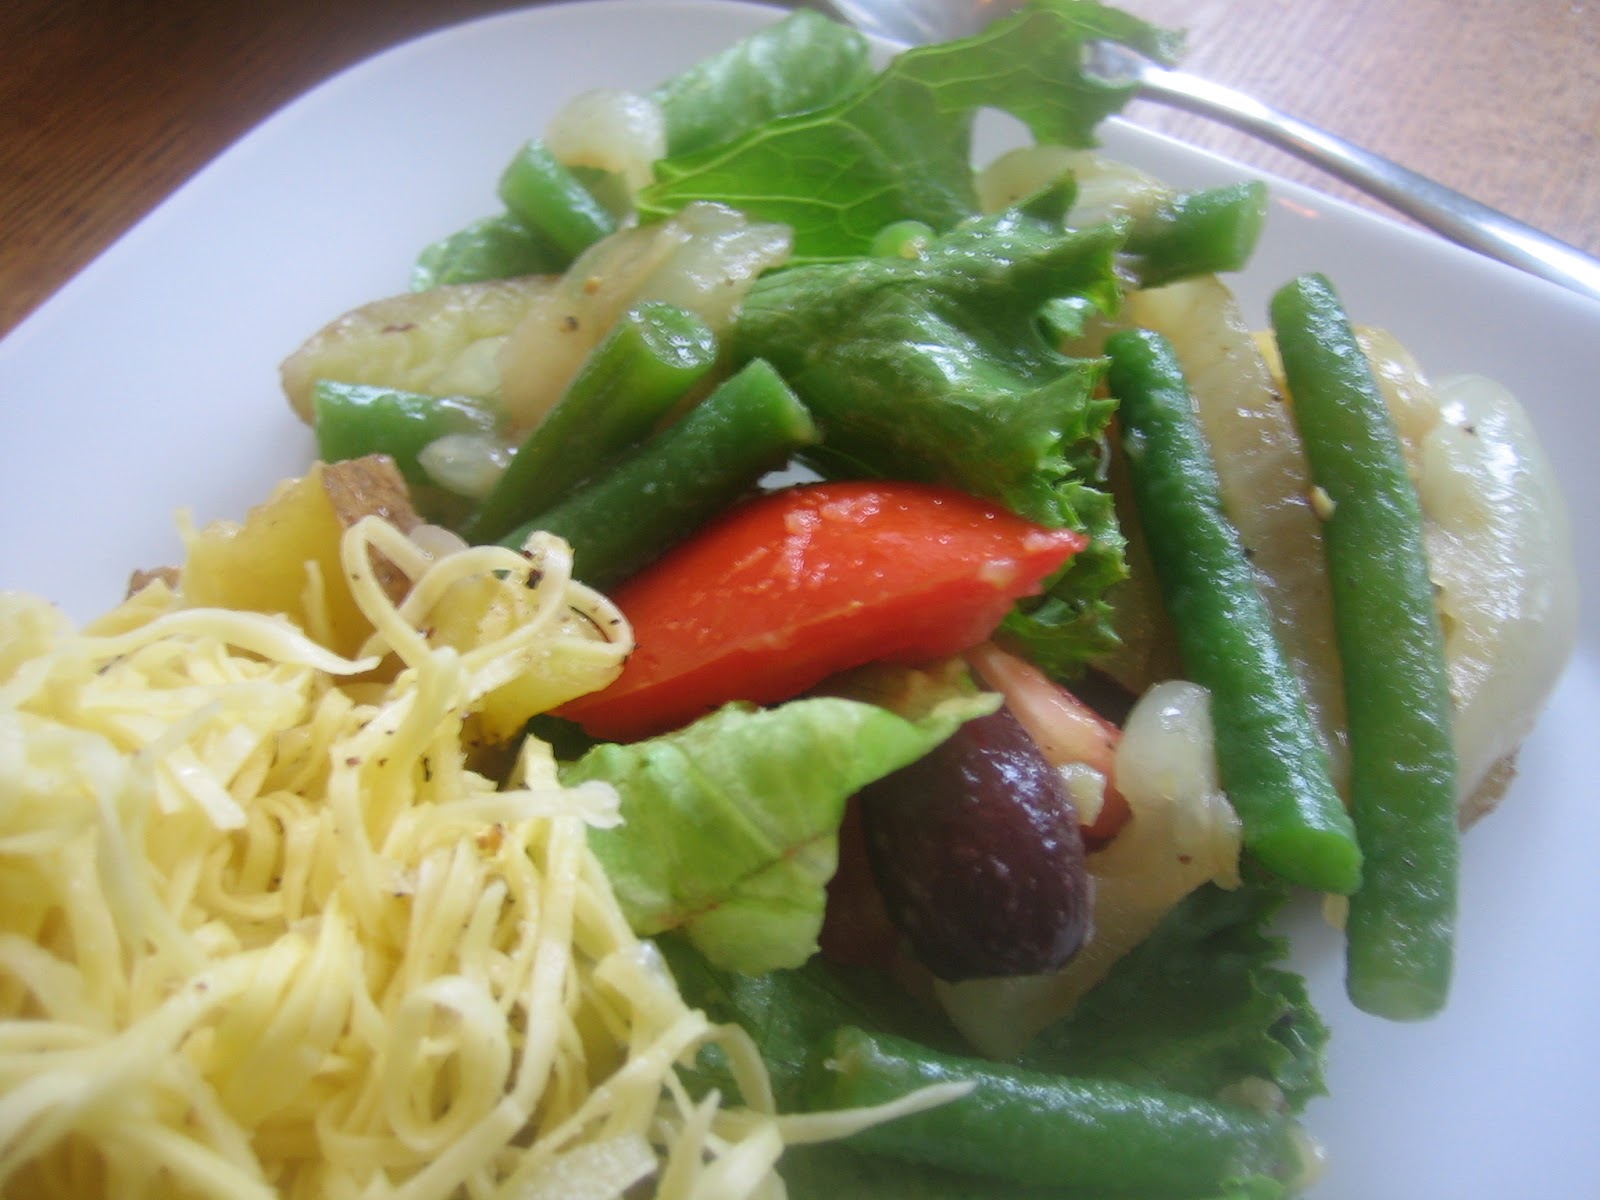
Verona is also home to some spectacular churches, and I had a terrific lunch there featuring a hefty pile of greens mixed with black olives, cannellini beans and chunks of terrific oil-cured tuna.  The kick-ass salad is definitely a relative of that Veronese salad, with the added advantage of being vegan.

This salad is all in the prep work, and could be varied according to the season.  We found one passable-looking tomato (Alaska gets notoriously terrible tomatoes), but the next time I would leave that out in favor of a vegetable in better shape.


Insalata Cruda e Cotta (Raw and Cooked Salad)

Adapted from Lidia's Italy
2 large, sweet yellow onions, peeled, trimmed and sliced 1/2" thick
1/3 cup extra-virgin olive oil
1/2 tsp. sea salt
1/2 lb. small red or gold potatoes
1/2 lb. fresh green beans, trimmed
1 fresh tomato, chopped
3/4 lb. fresh leafy salad greens
1/2 cup black olives, pitted
3 tbsp. red wine vinegar
Salt and fresh-ground black pepper to taste

Preheat the oven to 375 degrees.  Brush the onion slices with olive oil in both sides, and sprinkle with salt and pepper.  Lay them on the baking sheet and bake the onion slices approximately 25 minutes, flipping halfway through.  The onions should be a light golden brown when done.

While the onions are cooking, start a large pot of water to boil.  Clean the potatoes and drop them in the boiling water.  Cook just until the potatoes are cooked through--you want them to hold together and not get mushy.  Remove the potatoes--don't get rid of the boiling water!--and cut them in good-sized wedges when cool enough to slice.

Add the trimmed green beans to the water and boil just long enough to bring out the color, about four minutes.  You'll want the beans to stay crisp.  When you remove them from the water, put them in a bowl with cold water and ice cubes to shock them so you'll keep the gorgeous color. 

If you have a salad spinner, this is the time to put it to work.  Wash and thoroughly dry the greens--use your favorite in-season lettuces.  I had green leaf lettuce in my CSA box, so that's what I used, but it would be fun to use lettuces of different textures and colors.

In a ramekin or small bowl, combine the vinegar and remaining olive oil and whisk together.  Add salt and pepper to taste.  Then throw all of the ingredients except the lettuce and dressing in a large salad bowl and gently toss them together.  Add the lettuce and dressing and toss gently again;  serve immediately.

Makes four large salad servings.  If you do not plan to use all of the vegetable mixture, hold some back and don't toss it with the lettuce.  I had a couple lunches' worth of these salads later in the week.

Monday, June 4, 2012

To Rome, With Love

Yesterday, I actually got to see a movie.  In the theatre.  This happens less often than you would think.

One of the previews was for the new Woody Allen movie, To Rome with Love, which was apparently shot there last summer.  It stars Roberto Begnini, the Italian comedian who was the lead in Life is Beautiful, a movie I thoroughly disliked.  It's been more than ten years since it came out and I still can't believe it won an Oscar.  But I digress.  It doesn't necessarily look like a movie I like, but the shots of Rome were gorgeous.

David and I spent four days of our vacation in Rome, which is an unruly mixture of the ancient and modern.  You walk down a street of little restaurants and shops, and boom, there's the Colosseum.  You turn the corner from an equally modern street, and there are the Baths of Caracalla.  The latter of which closes promptly at 1 p.m. every single day, BTW, and woe to those who show up at 12:45. 

We had a couple of spectacular meals in Rome, which I will post about separately, but it's mostly not the major tourist sites that will stay with me, but things like the Borghese Gallery.  Unlike the Vatican museum, which was absolutely overrun with tour groups, the Borghese allows only a very tightly controlled number of people in at once and features spectacular art set in the gorgeous villa for which much of the art was purchased.  The villa is set in large, beautiful gardens and was one of the highlights of our time in Rome.  Tickets sell out several weeks in advance--if you're planning a trip to Rome, buy them once you know your dates.

There are certain sites in Rome that look exactly as you have seen them in movies and in photographs, the Colosseum foremost among them.  Then there are places that you've never seen, like the former Jewish Ghetto and the (still active) synagogue there.  If you have any interest in Jewish or Holocaust history, this is a must-stop place and is surrounded by a still active Jewish quarter full of small kosher restaurants.  The food was so good that David and I returned to one kosher meat restaurant for a second lunch.

That salad in the background is the bomb. 
It's coming at you later this week.

Since we arrived home six days ago, we've been eating a lot of Italian-style food.  For our anniversary a couple of months ago, David bought me another Lidia Bastianich cookbook, Lidia's Italy, in which she picks her favorite spots in Italy and provides recipes specific to that area.  This very simple pasta takes less than twenty minutes if you don't make your own pasta. 

At a restaurant in Emilia-Romagna, the homemade pasta had a gorgeous golden yellow color.  We asked the chef about the color, and he said that he simply doesn't use the egg whites.  David had to give it a try last night.  The color and texture were great, but it does yield a slightly stickier dough.

Pasta Cacio E Pepe
Adapted from Lidia's Italy

1 1/2 tbsp. whole peppercorns, coarsely ground
3/4 lb. fresh pasta or dried spaghetti
1 cup finely grated Pecorino Romano cheese
Extra-virgin olive oil (optional)

Boil a large pot of salted water for the pasta.  Depending on whether you are using fresh or dried pasta, cook either very briefly for the fresh or until just al dente for the dried.  Drain the pasta, but reserve a cup of the pasta water for tossing.

Put the drained pasta into a large bowl and toss with the cheese and pepper;  it will likely be very dry, so drizzle in the pasta water and a little olive oil until the cheese coats the pasta.  Adjust by adding more pepper, cheese or oil to taste.

Serve immediately.  Makes four small main course servings;  could serve six as a pasta course.

Thursday, May 31, 2012

From Rome to Munich

I'm back!  Although with a serious vacation hangover, otherwise known as jet lag, that causes me to wake up at midnight thinking I have had a full night's sleep and that it's time to get up because, after all, it's 10 a.m. in Europe.

It's the price I pay for having a fabulous vacation, right?  That and a couple of extra pounds despite walking an average of eight miles a day.  I'm back to the gym in a serious way.

David and I flew from Anchorage to Rome, which is less difficult than you might think--there is a flight that goes straight from Anchorage to Frankfurt in about nine hours, and then we caught a quick flight to Rome.  We stayed in Rome for four days and then gradually worked our way back through Florence, Bologna, Verona, Trento and Bolzano in northern Italy, Innsbruck, Austria and finally Munich before catching a train back to Frankfurt.

I am so happy to have a large supply of clean clothes and my own bed, and lots of material to share here.  To start, let me give you an aperitif.  Literally.

From Rome to Munich, I kept seeing wine glasses containing a slightly fizzy orange drink on every outdoor cafe table.  Either Aperol has a really great advertising budget, or, as I conceded when I finally tried one near the end of our trip, this was a brilliant drink.

Aperol is a liqueur made primarily of oranges, including blood orange, plus unidentified herbs and roots. 

An Aperol Spritz is a drink containing Aperol, sparkling wine and sparkling water.  It is traditionally consumed as an aperitif because it is light, relatively low in alcohol and a totally kick-ass color.  David and I brought a bottle of Aperol back to play with, and I'm hoping that I can find it here locally because it's going to become the drink of the summer.

Don't use your fancy champagne here.  Prosecco is the traditional wine of choice, but we made it with cheap Spanish sparkling wine (cava) and it tasted great.  Also, play with the proportions--David liked his with a little less sparkling wine and a little more water.

Aperol Spritz

3 jiggers Aperol liqueur
2 jiggers sparkling wine
1 jigger sparkling water or club soda
Orange slices for garnish (optional)

Pour the sparkling wine and water into a large wine glass and add a few ice cubes and an orange slice if you have one.  Add the Aperol and give it a very quick stir.

Makes one serving.


Thursday, May 10, 2012

In Vacanza

The witching hour is practically upon me...I've been working like an insane person, compiling a packing list, studying my Italian verbs, writing way too many instructions for the cat/housesitters, and all that's standing between me and my vacation is two more (very full) days at work and, you know, the actual packing part. 

David and I have been spending most of our evenings at home this week, both to get more time in with Ingrid and to get ready to go.  Have you ever been so behind on blogging that you stop taking photos of food because you don't need more things to blog?  In the past week I have not photographed a terrific seafood risotto, a marvelous chicken piccata and a zippy fennel salad.  My future blog entries runneth over, though the chicken piccata was both easy and tasty enough that I expect to make it again this summer and will blog it then.

The exception was the cabbage rolls that I made earlier this week out of the head of cabbage that was rolling around in the vegetable drawer begging to be used.  A word of caution on making these:  my sweet little organic head of cabbage made this recipe more difficult--ideally, a cabbage with larger leaves would be better.

I found myself with a lot of leftover filling on my hands, which I made into meatballs and served with pasta last night. 

Finally, a thanks to those who commented on my mention that I had a no good, very bad day last Saturday.  Some of you may recall that I there was a situation with a friend with whom I was very close, who was having lots of issues during a play we were working on last fall and subsequently left the production.  He's said lots of awful things about me, and I've just been trying to be dignified and keep my head up because confronting him would have been pointless.  He has some significant problems and somehow I've become the scapegoat for them.

At a wedding we were both at last weekend, he yelled at David.  At the wedding.  Horrible and humiliating and painful, so of course I burst into tears and David and I left the reception.  This has been going on for six months and it's not getting any easier.

I hate being such an emotional person.  It's hard to write about this, even in kind of a detached manner.  So again, thanks to all who offered their support.

Whew.  And now on to the cabbage rolls.

Involtini di Verza in Umido (Stewed Stuffed Cabbage Rolls)
Adapted from the CIA's Italian Cooking at Home

12 large green cabbage leaves
1 lb. lean ground beef
1 lb. loose sausage, preferably a spicy Italian chicken or pork sausage
3/4 cup leftover cooked rice or small pasta (I used leftover couscous)
1 medium yellow onion, coarsely chopped
1 1/2 cups canned Italian whole tomatoes, crushed by hand
1 cup low-sodium chicken broth
2 bay leaves
1/4 cup parsley, chopped
1/4 cup fresh basil leaves, torn by hand or julienned
Kosher salt and fresh-ground black pepper

Start a large pot of salted water on the stove to boil.  When it is ready, add the cabbage leaves and blanch them until they are soft, about two to three minutes.  While you are doing this, start the oven to preheating to 350 degrees.  When the cabbage leaves are done, remove them from the water and place in a colander to drain.

In a large bowl, combine the ground beef, sausage, onion, rice or other pasta, and a little salt and pepper.  Use your hands to make sure everything is blended together.

Spray a large baking dish with nonstick spray or rub it with a little olive oil.

Using your hands again, shape the meat mixture into small rolls and place one in the center of each cabbage leaf.  Tuck the edges of the leaf around the bottom of each roll and place in the baking dish.

Once all the rolls are ready, pour the broth and then the crushed tomatoes over them and sprinkle with the parsley and basil.  Tuck the bay leaves into the pan.

Bake until the rolls are cooked through and very soft, about 45 minutes.

Makes twelve rolls, for about four main-dish servings.  Serve with a green salad and bread.

Monday, May 7, 2012

When Life Gives You Lemons

Have you ever woken up in the morning with a feeling of dread that something bad was going to happen that day?  That was Saturday for me...and as it turns out, I was right.  But that's too long and hard a story to tell right now.  It's Monday, after all, and we all need to think about more cheerful things.

The table looked gorgeous--I had David and a long-unused set of china to thank for that.
Last week was a whirlwind of work and appointments--we leave on vacation in less than a week, and with a cat diagnosed with bronchitis, houseguests (who we were actually terribly happy to see), work up to my ears and a to-do list as long as my arm, I didn't even touch my blog for another week.

Which means that I am behind in telling you about good events, such as the tea party I threw a week ago yesterday.  You may remember that my friend Arlitia started an event called "Tea and Strumpets," which was really an excuse for a fascinating group of women to get together, eat baked goods and drink lots of tea. 

When Arlitia held the first one, she made two varieties of scones, tea sandwiches and set out what must have been twenty teas to choose from--I lacked her tea variety, but I was determined to make what I think of as proper tea accoutrement--whipped cream, lemon curd, berry sauce plus crumpets and scones.

The crumpets discussion will have to wait, because those suckers were finicky.  Let me tell you about the absolute hit of the party.

Lemon curd.

I love lemon curd, but who knew it was so popular?  It's also ridiculously easy to make, a gorgeous color and you should never buy the stuff again.  It would make a perfect holiday gift in beribboned jars.

Lemon Curd
Adapted from Gourmet Magazine, April 2001

2 tbsp. lemon zest, finely grated
Juice of four lemons (about 1 cup)
Pinch of sea salt
1 cup granulated sugar
4 large eggs
1 3/4 sticks unsalted butter, cut into small cubes

In a small, heavy pot, combine the lemon zest and juice, sea salt, sugar and eggs and whisk together thoroughly.  Turn the stove on low and add all the butter in one batch.  Cook, whisking frequently, until all the butter melts and the curd thickens.  Do not let it boil, but when the curd is thick enough that you can see the whisking marks, remove the curd from the heat and strain it through a fine sieve or cheesecloth.

Transfer the strained curd to a small bowl and press a piece of plastic wrap against the surface.  Chill until the curd is thoroughly cooled, about 45 minutes.

Makes about 2 1/2 cups curd.