Food Buzz Badge

Showing posts with label cake slice society. Show all posts

Wednesday, February 20, 2013

Mise en Place

I love the term mise en place, which is basically French for having your ingredients together (I almost said having something else together, but never mind--it's been that kind of week) before you start.

I thought I did--really!

This month's Cake Slice pick was a red velvet cake, but with a frosting that mixed creamy marscapone cheese with the more standard cream cheese.  Here's where it gets hairy.  I thought I had red gel food coloring, which is essential for getting that deep, beet red color into the cake.

But it turned out to be pink gel color.  Oops.  The result was a lovely cake that was a deep brown-red due to the cocoa.  It was moist and tender, with gorgeous crumb.  The frosting initially looked like it wasn't coming together, but then I turned the hand mixer up on high and it whipped right up. 

I'm not convinced the cake recipe was particularly special, but the marscapone-cream cheese frosting was:  creamy, fluffy and not too sweet once I slightly reduced the amount of sugar.  It's a keeper.

As a total aside, red velvet cake was one of the specialties of my paternal grandmother, who was a professional baker.  Every time I eat it I think of her.

Marscapone-Cream Cheese Frosting
Adapted from Vintage Cakes by Julie Richardson

8 oz. cream cheese, softened
8 oz. marscapone cheese
1/3 cup sugar
1/2 cup heavy cream
1 1/2 tbsp. vanilla extract.

Beat together the cream and marscapone cheeses with a hand mixer on medium speed until they are light and fluffy.  Add the heavy cream, sugar and vanilla and turn the mixer up to high.  Beat until the icing is fluffy and the cream is fully whipped.

This recipe produces enough frosting to spread between the layers of a two-layer cake, and to thinly cover the sides and top.  Due to the cream in it, it will need to be kept refrigerated.

Saturday, February 9, 2013

Triage

The day Freud's Last Session  closed at the end of January, I had a grand plan to take a cake to strike--the period after the last show where you take down the set and clean the theatre in preparation for the next show moving in.  It's a dusty, often sweaty, process, and I frequently end up covered in paint.  Once when I was painting the stage floor in preparation for the next show to move in, I literally painted myself into the center of the stage.  Handy I am not--but I can bake a cake.

The Cake Slice's pick for last month was a banana cake with coffee-walnut buttercream frosting, which sounded great even though I was a week behind in making it.  I didn't have time to make the marvelous buttercream before I had to leave for the theatre, nor did I have time to frost multiple layers of cake, so I triaged the recipe and threw the coffee and the walnuts into the cake itself and baked it in a bundt pan.  It was so tender, golden and lightly sweet that it was a huge hit at strike. 

Banana-Walnut Bundt Cake
Adapted fron Vintage Cakes by Julie Richardson


This was all that remained of the cake after strike.  David
ate it for breakfast the next morning.
 2 1/2 cups all-purpose flour, sifted
1 1/2 tsp. baking powder
1/2 tsp. kosher salt
1/4 tsp. baking soda
1 1/2 cups mashed bananas (it took three for me)
3/4 cup buttermilk
1 cup unsalted butter, softened
1 2/3 cups granulated sugar
1 tbsp. vanilla
4 eggs, at room temperature
1/2 cup chopped walnuts, toasted
2 tbsp. strong coffee

Preheat the oven to 350 degrees and prepare a bundt pan by spritzing with nonstick baking spray.

Whisk together the flour, baking powder, salt and baking soda in a small bowl, then set aside.  Combine the bananas and butter in another small bowl.

Using a stand mixer with a paddle attachment, beat together the butter, sugar and vanilla on high speed until the butter becomes light and fluffy--about three minutes with my Kitchen-Aid.  Scrape down the bowl frequently.

Add the eggs one at a time, then turn the mixer to low and add the flour mixture in three parts, alternating with the bananas.  Scrape the bowl thoroughly and add the walnuts and coffee;  mix until the batter is just combined.

Scrape the mixture into the bundt pan, leveling the top.  Bake for approximately 45 minutes, or until a cake tester comes out clean.  Cool the pan on a wire rack for half an hour, then unmold and cool for a bit longer.

Serves 12 to 16.

Wednesday, December 26, 2012

Holiday Hangover

I am having a serious holiday hangover.  Not an alcohol hangover, or a food hangover, but just general malaise related to the holidays.  It felt like the holiday season was longer than ever this year--I don't know whether it is that Hanukkah was early or the party rounds started even earlier.  All I know is that I have an absolute inability to make small talk anymore.  I need a vacation.

It probably doesn't help that I am directing a show these holidays and we open in ten days.  It's a very intellectual play called Freud's Last Session, which imagines a conversation that Freud would have had with C.S. Lewis (a/k/a the theologian who wrote the Narnia books).  I'm not sure I have the requisite brain cells for this show some days.

I did manage, though, to make this month's Cake Slice pick--Mississippi Mud cupcakes with marshmallow frosting.  The cupcakes made the rounds of two parties on Saturday, plus went to a rehearsal. 

The frosting took a little work, but the cupcakes were a snap--use your favorite chocolate cupcake recipe and add about a cup of chopped pecans. 

As for the frosting?  Let's just say I ate spoonfuls of it out of the bowl.  I adapted the original recipe slightly to decrease the amount of sugar and increase the vanilla.

Marshmallow Frosting
Adapted from Vintage Cakes by Julie Richardson

3/4 cup granulated sugar
1/4 tsp. cream of tartar
1/2 cup water
4 large egg whites
1/8 tsp. fine salt
2 1/2 tsp. vanilla

Stir together the sugar, cream of tartar and water in a small pot over medium heat.  Bring this to a boil, then cover with a lid and boil for an additional two minutes.

Uncover the pot and let it cook until a candy thermometer registers around 240 degrees, which is the soft ball stage for candy.

While the syrup is cooking, add the eggs whites and salt to the bowl of a stand mixture and whip them into firm peaks.  When the whites are at the firm peak stage, transfer the syrup to a measuring cup with a lip and then pour it gradually down the side of the mixing bowl. 

Keep whipping the egg white mixture until the peaks are very firm, then add the vanilla and whip the mixture again briefly.

Makes enough frosting for 24 cupcakes and some eating out of the bowl.

Tuesday, November 20, 2012

Taking the Cake

Where has November gone?

No, seriously, that wasn't a totally rhetorical question.  Where has November gone?  Granted, yes, I've been traveling for work.  Granted also that my two best friends from law school trundled all the way up here for four days.  But aside from that, why haven't I had time to post?

Le sigh.

David turned the cake out of the pan while I was at the airport picking up my friends. 
He apparently didn't get the memo that the streusel goes on top.
The good news is that this month's Cake Slice pick, Shoo-fly Cake, was a kind recipe for those on a time budget.  It took less than fifteen minutes to whip up, less than an hour to bake and stayed moist for four days in a cake keeper.  It's simple, and perhaps not the prettiest cake ever (it initially looked burned when turned out of the pan), but is delicious and spicy.  I served a warm slice to my friends when they arrived, and trust me when I said they looked very happy.

This cake is redolent of dark molasses and is wonderfully old-fashioned.  My father-in-law loves molasses, so when David travels to Cleveland next month, I'm contemplating sending one of these babies with him.  I'm not sure David will consent to carrying a cake carrier through the airport, but what he doesn't know now won't hurt him.

I changed the spices in the original recipe slightly to accommodate what was currently in my pantry, but another point in this cake's favor is that most of this items are likely to exist in a well-stocked pantry already.

On another note, wishing everyone a wonderful Thanksgiving!

Shoo-fly Cake

For the streusel:
1/2 cup brown sugar, packed
3/4 cup flour
1/4 cup unsalted butter, cubed

For the cake:
1 cup sugar
3/4 cup butter, melted and cooled
3/4 cup unsulphured molasses
2 tsp. vanilla extract
2 eggs
2/12 cups flour
2 tsp. ground ginger
1 tsp. ground cinnamon
1 tsp. ground allspice
1 tsp. baking soda
1/2 tsp. kosher salt
1 cup warm coffee (I used a Starbucks Via packet dissolved in 8 oz. warm water)

Spritz a 9-inch cake pan with nonstick baking spray, and preheat the oven to 350 degrees. 

First, make the streusel by whisking together the flour and brown sugar in a small bowl.  Add the butter cubes and pinch the mixture together with your fingers until it forms crumbs.  Put the bowl in the refrigerator until you're ready to assemble the cake.

In a large bowl, stir together the sugar, butter, molasses and vanilla until well combined.  Stir in each egg separately.

In a medium bowl, whisk together the flour, spices, baking soda and salt until well combined.  Add the flour mixture to the molasses mixture in three additions, alternating with the coffee, folding the mixture together with a spatula.  The batter will be somewhat thin--don't worry about that.

Pour the batter into the cake pan, then smooth the top.  Sprinkle the crumb topping liberally over it and bake for 45 minutes, or until a skewer through the middle comes out clean.

Allow to cool partially on a wire rack, but this cake is absolutely delicious warm!  Keeps for at least four days in a cake keeper.

Makes eight generous slices.

Monday, October 22, 2012

Sugar & Spice

Allow me to recount a conversation I had with David yesterday as we were compiling a grocery list for last night's dinner party:

Me:  Do we have molasses?

David:  Yes.  Two kinds.

Me:  Is there at least a cup?  That's how much I need for this cake.

David:  Definitely.

The problem was that I didn't ask what kind of molasses.  I assumed one was milder and the other was darker.  Little did I know that one of them was pomegranate molasses, typically used in Middle Eastern food but not exactly suitable for a ginger spice cake.  However, by the time I discovered this all the ingredients were on the counter and I had to get started.

This cake was probably meant to be ginger-spicy and sweet, but ended up slightly tangy due to the pomegranate molasses.  Although it was tasty, it wasn't quite what everyone was expecting.  It was amazingly tender, though.

The original recipe is for a snack cake to be dusted with powdered sugar, but I added a light layer of cream cheese frosting and sprinkled additional candied ginger over it to dress it up for the dinner.

Farewell to The Cake Book as the Cake Slice book for the year!  It's been interesting (and by interesting, I mean there were some interesting cake fails in my kitchen), but next month we start working from Vintage Cakes.

Ginger Spice Cake
Adapted from The Cake Book by Tish Boyle

2 1/2 cups all-purpose flour
1/2 tsp. ground ginger
2 tsp. baking soda
1/2 tsp. ground cinnamon
1/4 tsp. salt
1/3 cup crystallized ginger, chopped
3/4 cup pomegranate molasses
1/4 cup mild molasses
3/4 cup brown sugar, packed (I used dark)
2 large eggs
1/3 cup fresh ginger, finely chopped
1 cup unsalted butter, cubed
1 cup water

Preheat the oven to 350 degrees and prepare a 9-inch springform pan. 

Whisk together the flour, ground ginger, cinnamon and salt;  remove two teaspoons of this mixture and transfer them to a small bowl.  Mix the candied ginger with the two teaspoons of flour.

Mix together the molasses and brown sugar in a large bowl, then add the eggs and mix until blended.  Add the candied ginger and mix again.

Heat the butter and water together in a small saucepan, and whisk until the butter is melted.  Stir in the baking soda, and then remove from the heat.  Add half a cup of this to the molasses mixture to temper it--this will foam wildly, hence the need for the large bowl.  Then whisk in the remaining butter mixture.

Whisk in the flour mixture and candied ginger, then pour the batter into the springform pan.

Bake for approximately fifty minutes.  This time is approximate, so use a toothpick and check at the forty-minute mark.  Cool the cake on a baking rack before removing the side of the springform pan.

Dust with powdered sugar or add cream cheese for a "dressier" cake.  Serves 10-12 depending on the size of the slices.

Monday, August 20, 2012

Lost and Found

There is nothing like bringing a dish back from the brink to make you feel a sense of accomplishment.

This month's Cake Slice pick, an "ultimate lemon roll," sounded fantastic.  However, like so many of the other desserts I have made from Tish Boyle's The Cake Book, in execution it turned out to be a bit sloppier.  As in crumbling sponge cake, oozing lemon curd kind of sloppy.  Eesh.

Since I was serving this as dessert for Erika's going-away dinner, I wanted it to look presentable.  Everything tasted good, it was just too messy to put on a platter and serve for dessert.

Enter the savior of many a baker with a less-than-gorgeous cake:  frosting.  Specifically, frosting made from the remainder of the pint of heavy cream I purchased for the recipe.


As an aside, why is heavy cream not sold in containers smaller than a pint anywhere in the Municipality of Anchorage?

I whipped up that cream with a tiny bit of sugar and some vanilla, and frosted the heck out of the cake.  It covered the bumps, cracks and general lack of beauty, and gave it a certain je-ne-sais-quoi to boot.

If I made this again, I would go with a straight lemon curd filling, minus the cream.  Regular curd is thicker and therefore less likely to ooze.

In other advice, buy a lot of lemons.  I used at least five in making all the components of the cake.

The (Kinda, Sorta) Ultimate Lemon Roll
Adapted from The Cake Book by Tish Boyle

For the filling:
7 egg yolks
1 1/4 cups granulated sugar
1 tbsp. lemon zest
2/3 cup fresh lemon juice
Pinch of sea salt
1/2 cup unsalted butter, sliced into tablespoons
1/2 cup heavy cream

For the cake:
1 1/4 cups cake flour, sifted
3/4 cup granulated sugar
1 1/2 tsp. baking powder
1/4 tsp. kosher salt
3 eggs, separated
1 tbsp. lemon zest
1/4 cup fresh lemon juice
1/4 cup vegetable oil
1 tbsp. water
1 1/2 tsp. vanilla
1 egg white
1/2 tsp. cream of tartar
Powdered sugar

For the frosting:
Remainder of pint of heavy cream
1 tsp. vanilla
1 tbsp. granulated sugar

First, the lemon curd filling:

In a medium saucepan, whisk together the egg yolks and sugar, then place the pan on medium heat and add the butter, lemon zest and juice and butter.  Whisk the mixture together for about ten minutes, or until it thickens.  Using a fine strainer, strain the curd into a medium bowl, preferably a metal one.  Place the metal bowl in an ice water bath and stir frequently for fifteen minutes.  The curd should be slightly chilled.

During this process, be careful not to splash water into the curd, or disaster will ensue.

Next, the cake:

Using a hand mixer, whip 1/2 cup of the heavy cream at high speed until the soft peak stage.  Fold the cream into the curd in stages, then cover and refrigerate this mixture.

Preheat the oven to 325 degrees and prepare a jelly roll pan for the cake.  Line the bottom of the pan with parchment and sprinkle it with powdered sugar.  In a medium bowl, sift together the flour, 1/2 cup of sugar, the baking powder and the salt.  Whisk these ingredients together.

Using the hand mixer again, beat the egg yolks, lemon zest and juice, oil, water and vanilla until just blended.  Add the flour mixture in four installments and mix again.

If you look carefully, you can see the
start of the dreaded oozing.

In another medium bowl and using clean beaters, beat the egg whites and cream of tartar until the soft peak stage.  Drizzle in the remaining 1/4 cup of sugar, then increase the mixer speed to high.  When the whites are very stiff, fold them into the cake batter and then spread the batter in the jelly roll pan as evenly as possible.

Bake the cake for about fifteen to eighteen minutes, until it is lightly colored and springs when touched.  Place a baking rack over the cake and invert the pan so the cake ends up on the rack.  Do this as gently as possible, because this cake wants to crack. 

Remove the parchment paper from the bottom of the cake, then roll the cake using the parchment paper--the paper will be rolled up with the cake.  Let rest on the baking rack until fully cooled.

When the cake is cool, unroll it and trim the edges on the short ends.  Spread the lemon mixture to within one inch of the cake edges, then re-roll the cake and transfer to a serving platter.  You will have leftover curd.

Finally, when the cake appears to be lost, the frosting:

When your cake doesn't look presentable, whip the remaining cream with the vanilla for the frosting, drizzling in the tablespoon of sugar.  Wipe up any lemon curd that has oozed out of the cake and onto the platter and then frost the heck out of the cake.  Cover and refrigerate immediately.


I served the cake slices with a pool of the curd mixture beneath them and garnishes of the remaining frosting on the side.

Friday, July 20, 2012

Start with the Basics

I've been in the casting process this week for the next play I'm directing, On Golden Pond.  Do you know the movie?  It had Katharine Hepburn and Henry Fonda as a couple in their late 70s who return to the same rural cabin in Maine every summer that they bought when they were newly married.  That's really about it for the plot, except for a subplot concerning their adult daughter and her difficult relationship with her father.
The movie came out when I was nine or ten, and I loved it.  What nine-year-old loves On Golden Pond?  I think mostly it was because I was obsessed with Katharine Hepburn.  As an aside, do you know if you type the name "Katharine" into Google, the first entry is for Katharine McPhee, who was on American Idol, and not Katharine Hepburn?  That just seems wrong.

Most people are nervous when they come audition.  The thing they don't know is that I'm nervous, too, because I really want to find the right people. 
It's a little like having the right ingredients--if the basics are solid, it's much harder to screw up the end product.
This month's Cake Slice pick didn't initially interest me--a loaf cake of frozen mousse sandwiched with chocolate wafers.  However, the mousse is simple and delicious.  I made a few adaptations to use coffee rather than espresso beans, and Kahlua rather than Frangelico because I don't think I've ever had Frangelico in the house.
We served it for the Bastille Day dinner, and it was delicious.  Better yet, I was able to make it a day ahead of time and didn't have to worry about it the day of the dinner party.
Frozen White Chocolate-Espresso Loaf Cake
Adapted from The Cake Book  by Tish Boyle
1/4 cup water
1 1/2 tsp. powdered gelatin
2 1/4 cups heavy cream
1/3 cup ground coffee
9 oz. good-quality white chocolate chips (I used Ghirardelli)
2 tsp. vanilla
1 tbsp. Kahlua liqueur
Nabisco chocolate wafers
Line a large loaf pan with plastic wrap, ensuring that the ends of the wrap hang out of the pan.
To make the mousse, pour the water in a small coffee cup and sprinkle the powdered gelatin over it.  Let it sit for five minutes.  In the interim, make a small sachet out of cheesecloth (I used an old linen tea towel) and put the ground coffee in it.  Place the sachet and 1/2 cup of the cream in a small saucepan.  Bring the cream to a boil, then remove the pan from the heat and set it aside for at least fifteen minutes.
Place the coffee cup in the bottom of another small saucepan or skillet and add water until it comes halfway up the side of the cup.  Bring the water to the boil and stir the gelatin until it is totally dissolved.  Then turn off the heat and set the pan aside.
Remove the coffee sachet from the cream, squeezing it to release excess liquid.  Put the saucepan back on the heat and let it come to a boil.  Put the chocolate in a medium bowl, then pour the hot cream and gelatin over it.  Whisk the hot liquid into the chocolate until it is completely melted, then whisk in the vanilla and Kahlua. 
Let the chocolate mixture cool.  Then pour the remainder of the cream in a medium bowl and whip it to the soft peak stage using a hand mixer on medium speed.  Fold in the white chocolate mixture in three installments.
To make the cake, pour about one and a half cups of the mousse over the bottom of the loaf pan and smooth it.  Spread one of the chocolate wafers with a dollop of the mousse and press it against the long side of the pan.  Continue placing the chocolate wafers in rows in this same manner--you may need to break wafers in half to get to the end of the pan. 
When you put the second row in, make sure the wafers are sandwiched against the first row.  Continue until you have put it as many rows as possible, then carefully pour the remaining mousse in and spread it evenly.  Cover the pan with plastic wrap, ensuring that it is touching the mousse.  Freeze for at least four hours, or overnight.

To unmold, lift the edges of the plastic wrap.  Cut into 3/4 inch slices and allow them to stand a few minutes at room temperature before serving.
Makes approximately ten slices.

Wednesday, June 20, 2012

We're Having a Heat Wave

I grew up in Nebraska, where it was not unusual for it to reach 100 degrees in the summer.  There's a song my mother used to sing:  "We're having a heat wave, a tropical heat wave."  Anyone know that song?

Flash forward twenty years, where it hit 75 degrees in Anchorage on Sunday night and the air was thick and humid in preparation for some serious rain.  Mosquitoes swirled about the yard and David and I started to complain about how hot it was.  So what did we decide to do?  Run the oven cleaner.  The temperature on the lower level of the house rose another ten degrees.  (In my defense, I'm not a total whiner.  This inability to handle heat happens to everyone who moves to Alaska.  I lived in New Orleans for four years, and I once lived in an apartment in St. Paul, Minnesota with no air conditioning and the temperature regularly hit 95-100 that summer).

So of course I decided to frost a cake.  Seriously intelligent move.  I had to move the cake out of the kitchen to prevent frosting from melting down its sides.

I'm back on schedule with the Cake Slice group this month, after having been on vacation for May's cake pick.  In the interest of full disclosure, this cake should have a layer of pudding between the two layers.  This pudding, logically enough, required heavy cream.  And here is the joy of living in Alaska:  the large, normally decently-stocked grocery store near my home had no heavy cream on Sunday afternoon.  Zip.  None.  Nada.  So I doubled the frosting and skipped the pudding.

Omitting that step saved a lot of time, and judging from the comments of some of my fellow bakers, some serious angst;  apparently it was hard to keep the layers from sliding when the pudding was sandwiched between them.

This version requires less than an hour of active time, and is seriously, deeply chocolatey, not too sweet and with just a hint of coffee.   Even though I'm not much of a chocolate person (gasp!), I loved it. 

Brooklyn Blackout Cake
Adapted from The Cake Book by Tish Boyle

For the cake:
1 1/2 cups all-purpose flour
1 cup dark cocoa powder
1 1/2 tsp. baking powder
1 1/2 tsp. baking soda
1 tsp. salt
1 3/4 cups granulated sugar
2 large eggs
1 egg yolk
1 cup buttermilk
1/2 cup unsalted butter, melted
2 tsp. vanilla
1 cup hot brewed coffee (I used a Starbucks Via packet in 8 oz. of hot water--worked like a charm)

For the frosting:
8 oz. unsweetened chocolate, roughly chopped
22(!) tbsp. unsalted butter, softened
3 cups powdered sugar
4 tsp. vanilla

Position a rack in the center of the oven and preheat it to 350 degrees.  Spray two 9-inch cake pans with baking spray with flour and set aside.

Sift together the flour, cocoa, baking powder, baking soda and salt into the bowl of your stand mixer, if you have one, or a large bowl if you're using a hand mixer.  Whisk in the granulated sugar and set the bowl on the stand mixer.


Whisk together the eggs, egg yolk, buttermilk, melted butter and vanilla in a medium bowl.  Put the stand mixer (or hand mixer) on low speed and slowly drizzle the wet ingredients into the coca mixture.  Scrape down the sides of the mixing bowl and ensure that it is well-mixed.  Then add the coffee, mixing until just blended.

Using a spatula, fold the mixture together to ensure that the ingredients on the bottom have been thoroughly mixed in;  when they have, divide the batter between the two cake pans and bake for thirty minutes, or until a toothpick comes out clean.  Cool the cakes on a baking rack while you prepare the frosting. 

Using a double boiler, melt the unsweetened chocolate over simmering water.  When the chocolate is melted, take it off the water and let it cool.

In the interim, using a stand or electric mixer, beat the butter until pale yellow and creamy--don't overbeat.  Add the powdered sugar and beat on medium speed until it is thoroughly combined, scraping down the sides of the bowl at the end.  Then add the chocolate and vanilla, and beat again until combined.

To assemble the cake, tip the cakes out from the cake pans.  You can leave a slight dome on the layer you designate for the top, but using a serrated knife even off the layer that will be on the bottom.  Then slice each layer in two.

Place the lower half of the bottom layer on the serving plate, then cover with a thin layer of the chocolate frosting.  Repeat with the remaining layers, then frost the sides and then the top of the cake, continuing to use the offset spatula. 

Serves 10 to 12, depending on how thickly you slice it.

Friday, April 20, 2012

Better than Starbucks

Yesterday I flew to St. Louis to attend my parents' retirement reception from the small university where they work.  They didn't know I was coming.

I am not normally given to springing huge surprises on people--but in this case it seems to have been very effective, particularly since I walked into the party accompanied by a six foot tall purple and white griffin, presumably beet red.  Did I also mention that despite my theatrical background, I am not given to grand entrances?

Before I rushed off on the redeye Wednesday night, I finished the cake for this month's Cake Slice bakers.  Reader, I have a confession:  I didn't even eat a full slice of it.  Not because the cake was bad, but because I failed to cut a slice and tuck it into my bag, where it would have been most welcome at 3 a.m. somewhere over Canada.

Although I loathe Starbucks on general principles, I will admit to a weakness for their reduced-fat cinnamon coffee cake.  It's tender with a big cinnamon streusel stripe through the middle of it.  This cake one-ups that by adding cardamom and orange zest.  It smelled heavenly out of the oven, and my lucky husband tells me that his colleagues ate this cake in a hot second yesterday. 

Cinnamon Swirl Buttermilk Pound Cake
Adapted from The Cake Book by Tish Boyle

For the streusel:
1/2 cup all-purpose flour
1/2 cup packed dark brown sugar
1/2 tsp. ground cinnamon
3 tbsp. salted butter, melted

For the cake:
2 cups all-purpose flour
1/2 cup cake flour
1 tsp. baking powder
1/4 tsp. baking soda
1/2 tsp. kosher salt
1/4 tsp. cardamom, preferably freshly ground
1 cup unsalted butter, at room temperature
1 3/4 cups granulated sugar
3 large eggs
2 tsp. vanilla extract
1 tbsp. orange zest
1 cup buttermilk

Preheat the oven to 325 degrees.  Prepare a bundt pan by spraying it liberally with baking spray.

In a small bowl, combine the dry ingredients for the streusel with a fork.  Then add the melted butter--I found it worked easiest to mix it in with my fingers until it formed small clumps.

In a medium bowl, sift together the two flours, baking powder and soda, salt and cardamom. 

Using a stand mixer with the paddle attachment, beat the butter on medium speed until it is creamy and paler in color.  Add the granulated sugar in three installments, continuously beating on medium speed until all the sugar is incorporated.  Then add the eggs one at a time, beating well between each one.  Scrape down the bowl and then add the vanilla and orange zest.  Finally, turn the mixer to low and then add the flour mixture in three installments, alternating with the buttermilk.  Beat until just incorporated.

Pour half the batter into the bundt pan, then cover with the cinnamon streusel--it doesn't matter if the streusel layer is precisely even.  Then pour the remaining batter in, smoothing the top.


Bake until a skewer poked into the cake comes out clean, about 65 minutes.  Turn the cake out onto a baker's rack and allow to cool, or in my case, snap a quick picture and then run out the door for the airport.

Makes 12-16 small slices.

Tuesday, March 20, 2012

Gluten-Free and Fabulous

Thanks to everyone for their get-well wishes for my cat, Ingrid.  The good news is--how do I put this delicately on a food blog?--she is not hopping off the bed every morning at 5:30 a.m., howling pitifully and then--er--losing the contents of her stomach on the bedroom carpet.  Was that delicate enough?  We'll know more about how she's reacting to the medication in the next couple of weeks.

Rejoining the Cake Slice bakers after a month off, I have to sing the praises of these little chocolate cakes.  Admittedly, they were supposed to be molten chocolate cakes, but even with baking according to the letter of the instructions, there was no melting going on.  Rather, I would describe these as little souffle cakes with a slightly brownie-like center.  A list of their many fine qualities:

1.  They don't contain any flour.  This is the cake to make your friends who can't eat gluten.  Or for Passover, which is coming up quicker than I care to think about. 

2.  You already have all the ingredients.  A word on chocolate:  this is not the place to use your fancy, expensive chocolate.  My fellow Cake Slice bakers warned that the original all-bittersweet recipe was, well, just too bitter.  I like dark chocolate better than anyone, but I heeded the warning and used a combination of semi-sweet Baker's chocolate and part of a big Hershey bar that for reasons that pass understanding has appeared in my pantry. 

3.  You can make the batter ahead.  I made the batter and put it in the fridge for six hours before baking up the cakes.  No problem, just bring the batter to room temperature before baking.  It'll take you that long to preheat your oven anyway.


On top of that, the cakes were delicious, and not too sweet.  I served them with a side of honey gelato, the recipe for which will appear later this week.  Good vanilla ice cream would work just as well. 

This recipe can be easily doubled;  I cut it down because it was just for David and I.  We ate the leftover cake the next morning and it was more brownie-like, but equally delicious.

Individual Warm Chocolate Cakes
Adapted from The Cake Book by Tish Boyle

3 ounces semi-sweet chocolate, chopped
1.5 ounces milk chocolate, chopped
2 tbsp. unsalted butter, cubed
1/4 cup sugar
2 large eggs, separated
1/16 tsp. salt (basically just a pinch)
1/8 tsp. cream of tartar

Spray three six-ounce ramekins (or coffee cups, in my case) with baking spray with flour or butter them generously;  set aside.

Preheat the oven to 375 degrees.  Using a double boiler, melt the chocolate and butter over simmering water.  When the mixture is completely melted, remove from the heat.  Whisk in half the sugar, then the egg yolks.

In a small bowl, beat the egg whites and salt with an electric mixer.  When the whites are foamy, add the cream of tartar and beat at medium speed until the whites are at the soft-peak stage.  Then add the remaining sugar and beat the whites to stiff peaks.

Fold a third of the whites mixture into the chocolate until combined, then incorporate the rest of the whites bit by bit. 

Divide the mixture among the prepared ramekins/cups and place them on a baking sheet.  Bake for approximately 15 minutes, until the tops start to crack.  Watch closely because overbaking will mean no molten center.

Cool the cakes for a minute on the baking sheet, then run a knife around the edges to unmold.  Unmold immediately on the serving plate and garnish with powdered sugar and ice cream.

Makes three individual cakes.

Friday, January 20, 2012

Grounded for Life

Have you ever had to perform reconstructive surgery on a cake?  Or, in a related question, grounded a dish from ever leaving the house?

You can already tell that this is not a baking success story.

This month's Cake Slice challenge was easy enough, or so it seemed:  a vanilla genoise cake generously daubed with a coffee syrup and filled and iced with a tiramisu filling of marscapone, eggs and rum.  Sounds good, right?  I'm sure someone's was good, but mine was not.

And to top it all off, my camera was being weird last night.

The problem is that it wasn't even an interesting disaster.  As they say in theatre, if you're going to flub a line, flub it with style.  Make it look purposeful.  Or, at the very least, create a trainwreck of such epic proportions that people can't help but stop and stare.  As an aside, my friend Jill told me that I had to look at the website Cake Wrecks--if you haven't seen it, go look (after you finish reading this post, of course) and gawk at the sheer awfulness.


This cake was none of those things.  It started promisingly enough;  the egg concoction that went into the cake was beautiful and fluffy--I have the photos to prove it!--and then once the butter and the flour mixture were incorporated, the batter just sank before my eyes.  Just to complete the experiment, I baked the cake layers up.  They looked like the sad cousin of a dutch-baby pancake, but less tasty.  The layers were rubbery, flat and just sad.


And then, just because I don't know when to quit, I filled and frosted the sad little non-layers.  It looked passable if a little flat until you sliced into it.  With those rubbery little pancakes, it was inedible.


The marscapone filling/frosting was too good to go to waste, though, so of course I had to operate.  I made a beautiful pound cake (recipe on that this weekend), which proved that I did not have the baking equivalent of a black thumb. 

I then sliced the pound cake, duly swabbed the slices with the coffee syrup, and then scraped all the marscapone off the little pancakes and reconstructed the creation with the pound cake. 

The result?  Eh, it was fine.  I think I had pretty much given up on the dessert by this point, and the pound cake wasn't a great match for the marscapone, which was a little surprising. 


David then made a point of throwing his partially-eaten slice away and taking lots of pictures of it in the trash for me to post.  Thanks, honey.

I'm not posting the recipe for the cake because I think the recipe works, at least for some, but certainly not for me.  Next time I want tiramisu, I will use the tried and true ladyfinger method. 

Throw me a bone, here--what is your worst baking disaster?


Tuesday, December 20, 2011

Bûche de Noël: French for "Ridiculous Amount of Work"

I really don't know how people work in Starbucks.

I have schlepped my camera, camera connector, recipe and laptop all the way to Oregon, where I am working today, and I can't hear myself think over the whining of the sullen teenager sitting next to me at the counter, who apparently doesn't wish to sit with his family a few tables away but still wants to communicate from a distance.

As my friend Erika would say, le sigh.  And to think I once thought business travel was glamorous.

This month's Cake Slice Bakers pick was a challenging one:  a traditional French Bûche de Noël, or Yule log, complete with meringue mushrooms and chocolate leaves.  I set out on Saturday thinking that it would be time-consuming, but not complicated.


Boy, was I wrong.

I can't even enumerate all the things that went wrong, because it would just make me cry.  David came into the kitchen on Saturday afternoon to find me in full meltdown mode.  He then asked me to help him bring in his Christmas tree during a particularly delicate place in the French buttercream process. 

I walked away for two minutes--really!--and returned to find that my beautiful cooked meringue was not incorporating the butter and had turned into a curdled mess, which I promptly dumped down the garbage disposal.  A few minutes later, the garbage disposal started belching the mixture back up again.

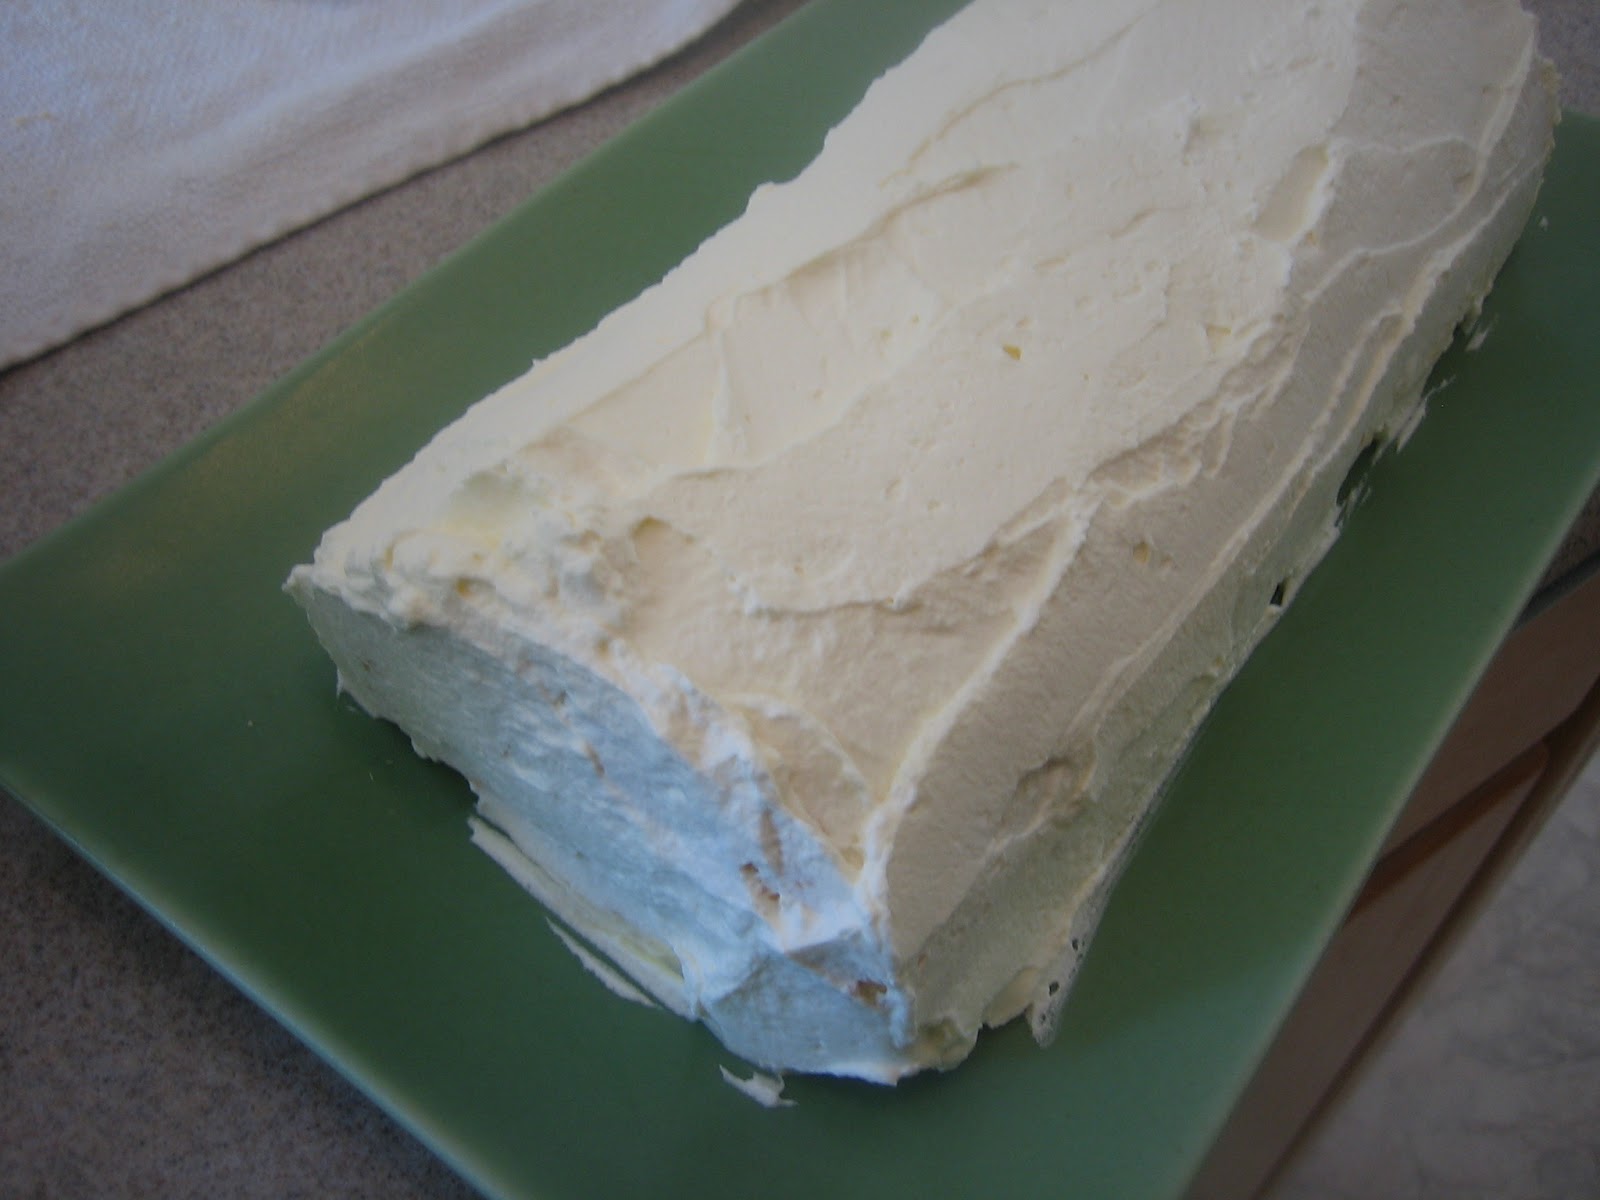
Neither David nor I are particularly handy people, but he managed to fix the garbage disposal and I decided that using a cream cheese icing would make my life a lot easier at that point, which was more than two hours into the process.

Yes, the final product was pretty.  Yes, it was delicious.  In the end I posted a photo of the final result on my Facebook page and my friend Stacey, an excellent cook, reminded me that I had just spent almost four hours on the fancy version of a Hostess HoHo.


Chocolate-Almond Bûche de Noël
Adapted from The Cake Book by Tish Boyle

For the cake:
2/3 cup cake flour, sifted
2/3 cup granulated sugar
1/3 cup Dutch-process cocoa, sifted
1 1/4 tsp. baking powder
1/4 tsp. salt
2 large eggs, room temperature
6 tbsp. vegetable oil
1 tsp. vanilla extract
3 egg whites
1/4 tsp. cream of tartar

For the almond syrup:
1/3 cup water
2 tbsp. granulated sugar
1 tbsp. amaretto liqueur

For the frosting:
24 oz. cream cheese, softened
1/2 cup powdered sugar
1 tsp. almond extract
4 oz. bittersweet chocolate (I used Ghirardelli)
2 tbsp. soft almond marzipan paste

For the garnish:
Meringue mushrooms (may be purchased here)

Preheat the oven to 350 degrees.  Line the bottom of a standard rimmed cookie sheet with parchment paper, and then spray it with nonstick baking spray with flour. 

Whisk together the cake flour, cocoa, 1/3 cup of granulated sugar, baking powder and salt.


In a separate, larger bowl, lightly beat together the eggs, oil and vanilla.  Add the flour mixture all at once and stir until just combined.


Using a hand mixer and a clean bowl, beat together the egg whites and cream of tartar to the soft peak stage, about 5-7 minutes.  Drizzle in the remaining 1/3 cup of granulated sugar and continue beating until the whites are stiff and glossy.

Fold a third of the egg whites into the chocolate mixture until just combined, then gently fold in the remaining whites.  Pour the batter into the prepared pan and bake for 12 minutes, or until the cake springs back when touched lightly.


While the cake is the oven, thoroughly dust a clean dish towel with powdered sugar and lay out on the kitchen counter.  When the cake is done, gently invert it onto the dish towel and remove the parchment paper.

Roll the cake up with the dish towel, starting at a long end.  Place the entire roll seam side down on a cooling rack.


To make the syrup, combine the water and sugar in a small saucepan over medium-high heat, stirring constantly.  When it boils, add the amaretto, immediately remove the saucepan from the heat and allow to cool completely.


Start the frosting by melting the bittersweet chocolate in a small saucepan with two tablespoons of water, whisking until the chocolate is completely melted.  Remove the chocolate from the heat and allow it to cool completely.

Using a stand mixer, beat the cream cheese with the powdered sugar until well blended, then add the almond extract.  This will not make a terribly sweet frosting, which kept the cake from becoming too one-note in my opinion.  You may add sugar if you prefer a sweeter frosting.

Divide the frosting into two bowls.  To one, add the cooled chocolate and beat with a hand mixer until blended.  To the other, add the marzipan and beat until blended.


To assemble the cake, unroll the cake from the dish towel.  Brush the cake thoroughly with the amaretto syrup--there will be some left over.

Using a serrated knife, trim the short ends, creating a three-inch strip and a one-inch strip.  These will be using for the branches coming off the main log.  Spread the almond frosting over these strips and roll up tightly, securing them in aluminum foil.  Place these in the freezer to firm up.

Thickly spread the almond frosting over the remainder of the cake.  Carefully reroll the cake and place it seam side down on the desired serving platter.


When the "branches" are firm enough, place them in the desired position next to the cake roll and attach them using a thin coating of the chocolate frosting.  Using an offset spatula, frost the entire cake with the chocolate frosting, using the spatula to create striations to give the impression of bark.


One of my actors demonstrating how not to eat this cake. 
Do not try this at home.

Arrange the meringue mushrooms around the log, securing the bottoms with a thin layer of chocolate frosting.  Immediate refrigerate the cake, and remove it a half hour before you plan to serve.

Serves approximately 12 people.