Food Buzz Badge

Showing posts with label entertaining. Show all posts

Monday, October 22, 2012

Sugar & Spice

Allow me to recount a conversation I had with David yesterday as we were compiling a grocery list for last night's dinner party:

Me:  Do we have molasses?

David:  Yes.  Two kinds.

Me:  Is there at least a cup?  That's how much I need for this cake.

David:  Definitely.

The problem was that I didn't ask what kind of molasses.  I assumed one was milder and the other was darker.  Little did I know that one of them was pomegranate molasses, typically used in Middle Eastern food but not exactly suitable for a ginger spice cake.  However, by the time I discovered this all the ingredients were on the counter and I had to get started.

This cake was probably meant to be ginger-spicy and sweet, but ended up slightly tangy due to the pomegranate molasses.  Although it was tasty, it wasn't quite what everyone was expecting.  It was amazingly tender, though.

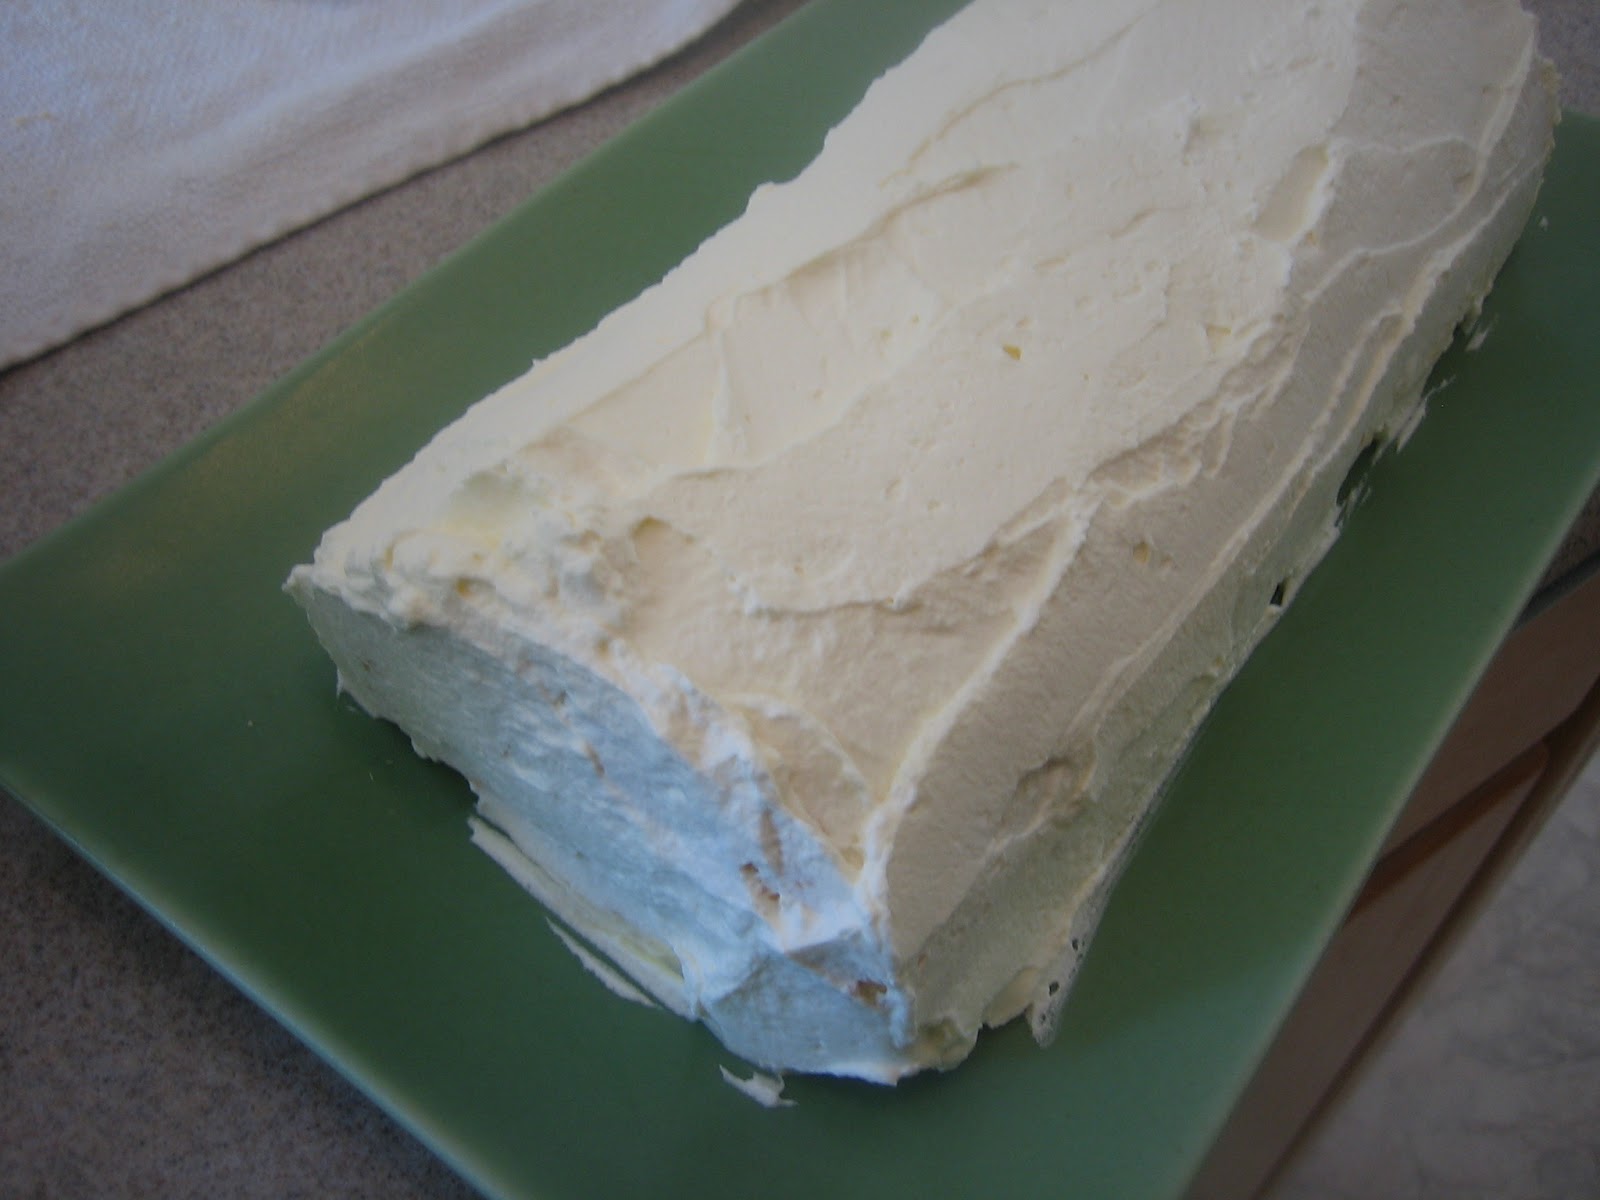
The original recipe is for a snack cake to be dusted with powdered sugar, but I added a light layer of cream cheese frosting and sprinkled additional candied ginger over it to dress it up for the dinner.

Farewell to The Cake Book as the Cake Slice book for the year!  It's been interesting (and by interesting, I mean there were some interesting cake fails in my kitchen), but next month we start working from Vintage Cakes.

Ginger Spice Cake
Adapted from The Cake Book by Tish Boyle

2 1/2 cups all-purpose flour
1/2 tsp. ground ginger
2 tsp. baking soda
1/2 tsp. ground cinnamon
1/4 tsp. salt
1/3 cup crystallized ginger, chopped
3/4 cup pomegranate molasses
1/4 cup mild molasses
3/4 cup brown sugar, packed (I used dark)
2 large eggs
1/3 cup fresh ginger, finely chopped
1 cup unsalted butter, cubed
1 cup water

Preheat the oven to 350 degrees and prepare a 9-inch springform pan. 

Whisk together the flour, ground ginger, cinnamon and salt;  remove two teaspoons of this mixture and transfer them to a small bowl.  Mix the candied ginger with the two teaspoons of flour.

Mix together the molasses and brown sugar in a large bowl, then add the eggs and mix until blended.  Add the candied ginger and mix again.

Heat the butter and water together in a small saucepan, and whisk until the butter is melted.  Stir in the baking soda, and then remove from the heat.  Add half a cup of this to the molasses mixture to temper it--this will foam wildly, hence the need for the large bowl.  Then whisk in the remaining butter mixture.

Whisk in the flour mixture and candied ginger, then pour the batter into the springform pan.

Bake for approximately fifty minutes.  This time is approximate, so use a toothpick and check at the forty-minute mark.  Cool the cake on a baking rack before removing the side of the springform pan.

Dust with powdered sugar or add cream cheese for a "dressier" cake.  Serves 10-12 depending on the size of the slices.

Monday, August 20, 2012

Lost and Found

There is nothing like bringing a dish back from the brink to make you feel a sense of accomplishment.

This month's Cake Slice pick, an "ultimate lemon roll," sounded fantastic.  However, like so many of the other desserts I have made from Tish Boyle's The Cake Book, in execution it turned out to be a bit sloppier.  As in crumbling sponge cake, oozing lemon curd kind of sloppy.  Eesh.

Since I was serving this as dessert for Erika's going-away dinner, I wanted it to look presentable.  Everything tasted good, it was just too messy to put on a platter and serve for dessert.

Enter the savior of many a baker with a less-than-gorgeous cake:  frosting.  Specifically, frosting made from the remainder of the pint of heavy cream I purchased for the recipe.


As an aside, why is heavy cream not sold in containers smaller than a pint anywhere in the Municipality of Anchorage?

I whipped up that cream with a tiny bit of sugar and some vanilla, and frosted the heck out of the cake.  It covered the bumps, cracks and general lack of beauty, and gave it a certain je-ne-sais-quoi to boot.

If I made this again, I would go with a straight lemon curd filling, minus the cream.  Regular curd is thicker and therefore less likely to ooze.

In other advice, buy a lot of lemons.  I used at least five in making all the components of the cake.

The (Kinda, Sorta) Ultimate Lemon Roll
Adapted from The Cake Book by Tish Boyle

For the filling:
7 egg yolks
1 1/4 cups granulated sugar
1 tbsp. lemon zest
2/3 cup fresh lemon juice
Pinch of sea salt
1/2 cup unsalted butter, sliced into tablespoons
1/2 cup heavy cream

For the cake:
1 1/4 cups cake flour, sifted
3/4 cup granulated sugar
1 1/2 tsp. baking powder
1/4 tsp. kosher salt
3 eggs, separated
1 tbsp. lemon zest
1/4 cup fresh lemon juice
1/4 cup vegetable oil
1 tbsp. water
1 1/2 tsp. vanilla
1 egg white
1/2 tsp. cream of tartar
Powdered sugar

For the frosting:
Remainder of pint of heavy cream
1 tsp. vanilla
1 tbsp. granulated sugar

First, the lemon curd filling:

In a medium saucepan, whisk together the egg yolks and sugar, then place the pan on medium heat and add the butter, lemon zest and juice and butter.  Whisk the mixture together for about ten minutes, or until it thickens.  Using a fine strainer, strain the curd into a medium bowl, preferably a metal one.  Place the metal bowl in an ice water bath and stir frequently for fifteen minutes.  The curd should be slightly chilled.

During this process, be careful not to splash water into the curd, or disaster will ensue.

Next, the cake:

Using a hand mixer, whip 1/2 cup of the heavy cream at high speed until the soft peak stage.  Fold the cream into the curd in stages, then cover and refrigerate this mixture.

Preheat the oven to 325 degrees and prepare a jelly roll pan for the cake.  Line the bottom of the pan with parchment and sprinkle it with powdered sugar.  In a medium bowl, sift together the flour, 1/2 cup of sugar, the baking powder and the salt.  Whisk these ingredients together.

Using the hand mixer again, beat the egg yolks, lemon zest and juice, oil, water and vanilla until just blended.  Add the flour mixture in four installments and mix again.

If you look carefully, you can see the
start of the dreaded oozing.

In another medium bowl and using clean beaters, beat the egg whites and cream of tartar until the soft peak stage.  Drizzle in the remaining 1/4 cup of sugar, then increase the mixer speed to high.  When the whites are very stiff, fold them into the cake batter and then spread the batter in the jelly roll pan as evenly as possible.

Bake the cake for about fifteen to eighteen minutes, until it is lightly colored and springs when touched.  Place a baking rack over the cake and invert the pan so the cake ends up on the rack.  Do this as gently as possible, because this cake wants to crack. 

Remove the parchment paper from the bottom of the cake, then roll the cake using the parchment paper--the paper will be rolled up with the cake.  Let rest on the baking rack until fully cooled.

When the cake is cool, unroll it and trim the edges on the short ends.  Spread the lemon mixture to within one inch of the cake edges, then re-roll the cake and transfer to a serving platter.  You will have leftover curd.

Finally, when the cake appears to be lost, the frosting:

When your cake doesn't look presentable, whip the remaining cream with the vanilla for the frosting, drizzling in the tablespoon of sugar.  Wipe up any lemon curd that has oozed out of the cake and onto the platter and then frost the heck out of the cake.  Cover and refrigerate immediately.


I served the cake slices with a pool of the curd mixture beneath them and garnishes of the remaining frosting on the side.

Wednesday, August 15, 2012

Goodbye Is the Hardest Part

We have all kinds of relationships in our lives...but a theatre director's relationship with a longtime stage manager?

Priceless.

For those who don't know what a stage manager does, it is the person who takes all the blocking notes, keeps the director on schedule, is the primary contact for the the designers (sound, costumes, lights, props) and, when the show opens, has the primary responsibility for making sure that it runs right and on time--and those are just the common duties.  The director hands the show over on the day it opens. 

It's a terrifying thing, or would be if I haven't been fortunate enough to have a small handful of stage managers who I also consider good friends and confidantes.

My friend Erika first stage managed for me when I directed my first professional show, Deathtrap, in 2007.  I would trust her with just about anything, and never had a second's hesitation about handing a show over to her on opening.  I've lost track of how many shows we've done together, but Sandy, the head of our local semiprofessional theatre company, calls us "the Dynamic Duo."

Eeks, it sounds like I'm eulogizing her, doesn't it?  It's not that.  Erika is heading off to a four-year program at a Russian Orthodox seminary to become a counselor.  She moves to Kodiak Island later this week.

It's a perfect fit of a profession for her, and I wish her all the best. 

David and I had Erika and Sandy over to dinner this past Sunday to say our goodbyes, or at least our "farewell for nows."  It was a lovely dinner, but of course bittersweet since we will really miss Erika.

For a first course, we served the Barefoot Contessa's salad with phyllo-wrapped goat cheese.  It's a stunning salad, even if my phyllo purses were not quite as pretty as the ones in the cookbook.  Make sure you serve the salad when the purses are fresh out of the oven.

Summer Salad with Phyllo Purses
Adapted from Barefoot Contessa Back to Basics by Ina Garten

8 sheets frozen phyllo dough, defrosted
8 tbsp. unsalted butter, melted
6 oz. log goat cheese
Baby salad greens (I used a spring mix, about 2 oz. greens per person)
2 1/2 tsp. champagne vinegar
1 tsp. coarse Dijon mustard
1 clove garlic, finely minced
1 tsp. kosher salt, plus more for serving
1/2 tsp. fresh-ground black pepper
1/2 cup extra-virgin olive oil

Preheat the oven to 375 degrees.  To prepare the phyllo purses, unroll the dough and set aside only what you need to use.  Cover the dough with a very lightly damp dishtowel--I ruined a couple of sheets of dough by using a towel that was too damp.


Trust me, they look so much better when browned.
Spread out one sheet of phyllo on a cutting board and brush all over with the melted butter.  Repeat with the remaining sheets of phyllo--you will want four sheets stacked on top of each other.  Cut the dough stack in half crosswise.

Cut the goat cheese log into discs about 1/4 inch thick.  Place two in the center of each phyllo section, then bring the sides of the phyllo square up to wrap around it.  The Barefoot Contessa compares it to wrapping a circular gift--you'll want to crimp together the top as much as you can, and get the dough as tight as possible around the bottom of each phyllo purse.

Repeat with the remaining phyllo--you will likely have some leftover goat cheese.

Spritz a small baking sheet or cake pan with nonstick spray and place the phyllo purses on it.  Bake for about twenty minutes, or until the purses are lightly browned.

In the interim, prepare the salad dressing by whisking the vinegar, mustard, garlic, salt and pepper in a small bowl.  Then whisk in the olive oil in a steady stream until the dressing emulsifies.

Place the greens in a salad bowl and toss by hand with a pinch of kosher salt, preferably flaked salt.  Then toss with the dressing until the greens are evenly coated.

Plate the salad with a small amount of dressed greens on one salad and one phyllo purse on the other.

Serves four, but could be easily doubled.

Friday, July 20, 2012

Start with the Basics

I've been in the casting process this week for the next play I'm directing, On Golden Pond.  Do you know the movie?  It had Katharine Hepburn and Henry Fonda as a couple in their late 70s who return to the same rural cabin in Maine every summer that they bought when they were newly married.  That's really about it for the plot, except for a subplot concerning their adult daughter and her difficult relationship with her father.
The movie came out when I was nine or ten, and I loved it.  What nine-year-old loves On Golden Pond?  I think mostly it was because I was obsessed with Katharine Hepburn.  As an aside, do you know if you type the name "Katharine" into Google, the first entry is for Katharine McPhee, who was on American Idol, and not Katharine Hepburn?  That just seems wrong.

Most people are nervous when they come audition.  The thing they don't know is that I'm nervous, too, because I really want to find the right people. 
It's a little like having the right ingredients--if the basics are solid, it's much harder to screw up the end product.
This month's Cake Slice pick didn't initially interest me--a loaf cake of frozen mousse sandwiched with chocolate wafers.  However, the mousse is simple and delicious.  I made a few adaptations to use coffee rather than espresso beans, and Kahlua rather than Frangelico because I don't think I've ever had Frangelico in the house.
We served it for the Bastille Day dinner, and it was delicious.  Better yet, I was able to make it a day ahead of time and didn't have to worry about it the day of the dinner party.
Frozen White Chocolate-Espresso Loaf Cake
Adapted from The Cake Book  by Tish Boyle
1/4 cup water
1 1/2 tsp. powdered gelatin
2 1/4 cups heavy cream
1/3 cup ground coffee
9 oz. good-quality white chocolate chips (I used Ghirardelli)
2 tsp. vanilla
1 tbsp. Kahlua liqueur
Nabisco chocolate wafers
Line a large loaf pan with plastic wrap, ensuring that the ends of the wrap hang out of the pan.
To make the mousse, pour the water in a small coffee cup and sprinkle the powdered gelatin over it.  Let it sit for five minutes.  In the interim, make a small sachet out of cheesecloth (I used an old linen tea towel) and put the ground coffee in it.  Place the sachet and 1/2 cup of the cream in a small saucepan.  Bring the cream to a boil, then remove the pan from the heat and set it aside for at least fifteen minutes.
Place the coffee cup in the bottom of another small saucepan or skillet and add water until it comes halfway up the side of the cup.  Bring the water to the boil and stir the gelatin until it is totally dissolved.  Then turn off the heat and set the pan aside.
Remove the coffee sachet from the cream, squeezing it to release excess liquid.  Put the saucepan back on the heat and let it come to a boil.  Put the chocolate in a medium bowl, then pour the hot cream and gelatin over it.  Whisk the hot liquid into the chocolate until it is completely melted, then whisk in the vanilla and Kahlua. 
Let the chocolate mixture cool.  Then pour the remainder of the cream in a medium bowl and whip it to the soft peak stage using a hand mixer on medium speed.  Fold in the white chocolate mixture in three installments.
To make the cake, pour about one and a half cups of the mousse over the bottom of the loaf pan and smooth it.  Spread one of the chocolate wafers with a dollop of the mousse and press it against the long side of the pan.  Continue placing the chocolate wafers in rows in this same manner--you may need to break wafers in half to get to the end of the pan. 
When you put the second row in, make sure the wafers are sandwiched against the first row.  Continue until you have put it as many rows as possible, then carefully pour the remaining mousse in and spread it evenly.  Cover the pan with plastic wrap, ensuring that it is touching the mousse.  Freeze for at least four hours, or overnight.

To unmold, lift the edges of the plastic wrap.  Cut into 3/4 inch slices and allow them to stand a few minutes at room temperature before serving.
Makes approximately ten slices.

Tuesday, July 17, 2012

Bastille Day

Thanks to everyone who entered the olive oil giveaway last week.  After searching for a random number generator, I found one on random.org--who knew there even was such a site?  The winner is Nami from the terrific blog Just One Cookbook.

Yes, we have a French flag. 
David is obsessed with flags.
My friends Scott and Kathy used to celebrate Bastille Day every year--sadly, they've deserted Alaska and moved to Kentucky, but this year David and I hosted a small Bastille Day dinner to keep the tradition strong.

Since it's been chilly and rainy here in Anchorage, David made Julia Child's beef bourguignon and ratatouille, and I whipped up a frozen white chocolate mousse dessert (coming Friday!) and some savory madeleines.

You read that right.  Savory madeleines. My mouth waters just thinking about them.

We had two couples over for dinner, so David proposed that I halve the original recipe because two madeleines per person sounded like enough.  I refused, which was the right decision.  These little suckers are good, and there wasn't a leftover madeleine to be had.

If you don't have a madeleine pan lying around, the recipe suggested a mini muffin tin--not a bad idea, though obviously not as pretty.

Make sure that your pear is really ripe--mine was not quite there, and had less flavor as a result.

Blue Cheese, Pear and Hazelnut Madeleines
Adapted from Chocolate & Zucchini by Clotilde Dusoulier

1 1/4 cups all-purpose flour
1 tbsp. baking powder
3 large eggs
1/2 tsp. sea salt
3/4 tsp. fresh-ground black pepper
2 tbsp. olive oil
1/2 cup buttermilk
3 oz. blue cheese, finely crumbled
1 ripe pear, cored and diced
1/3 hazelnuts, chopped

Preheat the oven to 350 degrees.  Whisk together the flour and baking powder in a small bowl and set aside.  In a larger bowl, whisk together the eggs, salt and pepper, then add the buttermilk, oil and crumbled cheese.

Whisk the dry mixture into the wet one until just combined, then fold in the pear and hazelnuts.

Spritz your madeleine pan thoroughly with baking spray with flour, and then fill the molds two-thirds of the way full with batter.

Bake for about sixteen to eighteen minutes, or until a toothpick inserted into one of them comes out clean.  Cool for a few minutes on a baking rack before unmolding.

Makes twenty-four madeleines. 


Thursday, July 12, 2012

An Embarrassment of Riches

Let me begin by saying:  I am not much into cutesy.

Crab is everywhere right now:  fresh boiled crab legs served simply with butter, crab omelets, and something called "Tabby's Crabby Patty."  Please note that the last one is at one of the best restaurants in town.

It may be very good, but I can't get past the name.

Summer in Alaska is an embarrassment of riches when it comes to fish and shellfish.  I won't claim that crab is cheap here, per se, but you can get decent deals on fresh frozen crab legs.  It's a luxury item that's brought back down to earth a little, at least for special occasions.

David and I were invited to a potluck of sorts at a friend's house on the Fourth of July.  Since the Fourth was in the middle of the week, I was feeling anxious about being out of the office, plus I was a little sunburned (not a good look for me--and I'm vigilant with sunscreen!) and generally cranky.  I didn't feel like making that much of an effort, to be honest, but I'm too persnickety to take food that I'm less than proud of to a potluck.

Enter this luxe-looking spread, which looks more complicated than it is.  It takes maybe fifteen minutes to put together, and that's only because you have to shell the crab.  I've tweaked the recipe from how it is originally written because the crab/butter ratio was off.  Also, learn from my mistake and chop the crab a bit finer than you see here.

As an aside, I had a great time at the potluck.  Sometimes it's just hard to leave the house to socialize when I'm in a mood, but I'm always good when I get there.

Before I get to the recipe, don't forget to comment to win a bottle of very good olive oil, my treat--just go here and leave a comment.  I'll randomly choose a comment left by 6 p.m. on Sunday.

Potted Crab Spread
Adapted from Bon Appetit Magazine, April 2012

2 lemons, zested and juiced
2 tbsp. cooking sherry
1/2 cup good quality unsalted butter, softened
1/8 tsp. cayenne pepper, or more to taste
Kosher salt and fresh-ground black pepper
6 oz. lump crabmeat, chopped coarsely but in relatively small chunks
Fresh chopped parsley (optional, but would give it great color)

Boil lemon juice and sherry in a small pan over medium-high heat;  it should reduce to just over a tablespoon.  Set this aside and allow it to cool.

Using a mini-prep food processor, blend the butter with the zest, cooled juice mixture and cayenne pepper until smooth.  Add the zest to taste, then transfer the butter mixture to a small bowl and fold in the chopped parsley (if used), salt and pepper to taste.  Add a bit more cayenne if you like.

Using a small spatula, fold in the chopped crab.  Divide the spread into two ramekins or other serving dishes, then smooth the tops and cover with plastic wrap.  Chill for at least an hour;  you will then need to bring it up to room temperature to serve.


Serve with buttered toasts or your favorite cracker--steer away from strongly flavored crackers to allow the crab flavor to shine.

Makes about one and a half cups of spread.

Wednesday, June 20, 2012

We're Having a Heat Wave

I grew up in Nebraska, where it was not unusual for it to reach 100 degrees in the summer.  There's a song my mother used to sing:  "We're having a heat wave, a tropical heat wave."  Anyone know that song?

Flash forward twenty years, where it hit 75 degrees in Anchorage on Sunday night and the air was thick and humid in preparation for some serious rain.  Mosquitoes swirled about the yard and David and I started to complain about how hot it was.  So what did we decide to do?  Run the oven cleaner.  The temperature on the lower level of the house rose another ten degrees.  (In my defense, I'm not a total whiner.  This inability to handle heat happens to everyone who moves to Alaska.  I lived in New Orleans for four years, and I once lived in an apartment in St. Paul, Minnesota with no air conditioning and the temperature regularly hit 95-100 that summer).

So of course I decided to frost a cake.  Seriously intelligent move.  I had to move the cake out of the kitchen to prevent frosting from melting down its sides.

I'm back on schedule with the Cake Slice group this month, after having been on vacation for May's cake pick.  In the interest of full disclosure, this cake should have a layer of pudding between the two layers.  This pudding, logically enough, required heavy cream.  And here is the joy of living in Alaska:  the large, normally decently-stocked grocery store near my home had no heavy cream on Sunday afternoon.  Zip.  None.  Nada.  So I doubled the frosting and skipped the pudding.

Omitting that step saved a lot of time, and judging from the comments of some of my fellow bakers, some serious angst;  apparently it was hard to keep the layers from sliding when the pudding was sandwiched between them.

This version requires less than an hour of active time, and is seriously, deeply chocolatey, not too sweet and with just a hint of coffee.   Even though I'm not much of a chocolate person (gasp!), I loved it. 

Brooklyn Blackout Cake
Adapted from The Cake Book by Tish Boyle

For the cake:
1 1/2 cups all-purpose flour
1 cup dark cocoa powder
1 1/2 tsp. baking powder
1 1/2 tsp. baking soda
1 tsp. salt
1 3/4 cups granulated sugar
2 large eggs
1 egg yolk
1 cup buttermilk
1/2 cup unsalted butter, melted
2 tsp. vanilla
1 cup hot brewed coffee (I used a Starbucks Via packet in 8 oz. of hot water--worked like a charm)

For the frosting:
8 oz. unsweetened chocolate, roughly chopped
22(!) tbsp. unsalted butter, softened
3 cups powdered sugar
4 tsp. vanilla

Position a rack in the center of the oven and preheat it to 350 degrees.  Spray two 9-inch cake pans with baking spray with flour and set aside.

Sift together the flour, cocoa, baking powder, baking soda and salt into the bowl of your stand mixer, if you have one, or a large bowl if you're using a hand mixer.  Whisk in the granulated sugar and set the bowl on the stand mixer.


Whisk together the eggs, egg yolk, buttermilk, melted butter and vanilla in a medium bowl.  Put the stand mixer (or hand mixer) on low speed and slowly drizzle the wet ingredients into the coca mixture.  Scrape down the sides of the mixing bowl and ensure that it is well-mixed.  Then add the coffee, mixing until just blended.

Using a spatula, fold the mixture together to ensure that the ingredients on the bottom have been thoroughly mixed in;  when they have, divide the batter between the two cake pans and bake for thirty minutes, or until a toothpick comes out clean.  Cool the cakes on a baking rack while you prepare the frosting. 

Using a double boiler, melt the unsweetened chocolate over simmering water.  When the chocolate is melted, take it off the water and let it cool.

In the interim, using a stand or electric mixer, beat the butter until pale yellow and creamy--don't overbeat.  Add the powdered sugar and beat on medium speed until it is thoroughly combined, scraping down the sides of the bowl at the end.  Then add the chocolate and vanilla, and beat again until combined.

To assemble the cake, tip the cakes out from the cake pans.  You can leave a slight dome on the layer you designate for the top, but using a serrated knife even off the layer that will be on the bottom.  Then slice each layer in two.

Place the lower half of the bottom layer on the serving plate, then cover with a thin layer of the chocolate frosting.  Repeat with the remaining layers, then frost the sides and then the top of the cake, continuing to use the offset spatula. 

Serves 10 to 12, depending on how thickly you slice it.

Monday, June 18, 2012

I Scream, You Scream

When I posted earlier this year that David and I were going to Rome, I received a couple of impassioned pleas to go check out particular foodie haunts.  One reader--I think it was Mike from The Culinary Lens--told me to go visit Gelato di San Crispino.  After a long, hot, jet-lagged day slogging around the Colosseum, Roman Forum and having the gates to the Baths of Caraculla closed on us because we were too late to get in, we decided to cut our losses and go get some gelato.  Smart decision.

Gelato di San Crisipino is tucked away on a tiny side street not terribly far from the Trevi Fountain.  It has a small sign out front, but the best way to locate it is a line of people out the door.  Once inside, there is a list of about twenty flavors, both fruit and cream, all made in-house.  Decide quickly, because the line moves fast and you don't want to be stuck stammering at the counter.

On that hot Monday, I selected zabaione, a cooked custard flavor, and chocolate rum.  David stuck with fruitier flavors, and we trekked up the hill to sit on a set of stairs and eat.  Let me tell you, it is worth the hype.  The flavors are pure and intense, and even the fruit flavors are unbelievably creamy.  It was almost enough to snap us out of our jet lag.  Almost.


That's David's "This is really good" face.
We went back two days later to see if it was as good as we remembered.  It was.

I once read that Alaskans eat more ice cream per capita than any other state in the country.  It seems a little random, but it's true that everyone is happy to see ice cream, particularly when it's homemade.  For a friend's birthday party, I made this gelato-like concoction.  It tastes like the best vanilla malt you've ever had.  Malt powder can be purchased from King Arthur's Flour.

This recipe has a softer consistency.  If you like your gelato firmer, freeze it in smaller containers.

Vanilla Malt Gelato
Adapted from Ben & Jerry's Ice Cream and Dessert Book

4 large eggs
1 1/4 cups granulated sugar
4 cups heavy cream
2 cups 2% milk
2/3 cup malted milk powder
4 tsp. vanilla extract

Whisk the eggs in a large bowl until they are fluffy and pale yellow, then gradually whisk in the sugar.  Pour in the heavy cream and milk and whisk until thoroughly blended.

The gelato was particularly good with a homemade caramel sauce.

Whisk in the malt powder and vanilla, then allow the mixture to sit for 15 minutes.

Pour into an ice-cream freezer and process until it is a soft-serve consistency.  For my freezer, this was about half an hour.

Transfer the gelato to a large storage container and stash in the freezer.

Makes 2 quarts.

Tuesday, April 24, 2012

A Pox on Your House, Thomas Keller

There was a line in the show I just directed:  "Some words are meant to be spelled, not used." 

My adaptation of that line: some recipes are meant to be aspirational, not made.

I read food magazines on the elliptical at the gym, which is a way to pass the time and dream about food that I don't always want to make.  So when I read the article about chef recipes made easy, I was intrigued.  Despite the fact that one of them was by Thomas Keller.

I know I've said this before, but I pretty much never use my Thomas Keller cookbooks.  They're fun to look at, but I have no desire to spend six hours and every pot in my kitchen making dinner.  But what can I say?  The recipe sounded great.


Two hours later and only most of the pots in my kitchen sullied (what did I DO with all that time?), I concluded that even a simplified Thomas Keller recipe was more than I wanted to do for a weeknight dinner.  But hey, it sure looked pretty, and it was quite tasty except for the fact that the recipe had the vegetables finishing way before you're ready to use them.  I've modified the recipe here to hopefully get everything to the table still warm. 

I was unable to find large sea scallops on the day I made this, but I recommend them if they are available.  That gorgeous, spicy rice recipe will come later this week.

Seared Scallops with Peanut Sauce
Adapted from Food & Wine Magazine, January 2012

2 tsp. hot curry powder
1/4 cup extra-virgin olive oil
2 tbsp. fresh-squeezed lime juice
1/2 lb. cauliflower, cut into small pieces
6 oz. snow peas, trimmed
2 tbsp. panko crumbs
1/4 cup plus 2 tbsp. crunchy peanut butter, preferably natural
1 1/2 pounds sea scallops, preferably large
Kosher salt and fresh-ground pepper to taste

Preheat the oven to 450 degrees.  In a small jar or bowl, shake or whisk together the curry powder and olive oil.  Let this sit for at least 15 minutes, or until the curry settles at the bottom.  Then strain through a coffee filter so the curry is removed, leaving you with just the oil.  Stir in the lime juice and add salt and pepper to taste.

Arrange the cauliflower on a baking sheet and drizzle evenly with two tablespoons of the olive oil.  Meanwhile, bring a small pot of water to a boil for the peas.

In a small skillet, warm one tablespoon of the olive oil.  When it is shimmering, add the panko crumbs and stir until they are slightly toasted, about three minutes.

Pat the scallops dry and season them with salt and pepper.  Place the cauliflower in the oven and bake until it is brown in spots, about fifteen minutes.  Place a large, oven-safe saucepan over high heat and add the remaining olive oil.

While the oil is heating, combine the panko crumbs with the peanut butter and stir to combine. 

When the oil is shimmering, add the scallops and sear them on one side for approximately four minutes.  Then turn the scallops over and lightly sear for another minute;  then remove the pan from the heat and top each scallop with a dollop of the peanut sauce.

Place the saucepan in the oven for approximately two minutes, which should melt the peanut sauce.  Boil the snow peas for approximately one minute, then immediately drain and rinse in cold water.

Remove the scallops and cauliflower from the oven and plate immediately on a bed of the cauliflower and snow peas.  Once the scallops, cauliflower and snow peas are on the plate, drizzle with a little of the curry oil.  Serve immediately.

Serves 4 as a light main dish.


Thursday, April 12, 2012

In Praise of the Potato

There's always a point during Passover when I whine about all the things I can't eat.  I'm a bread person, after all, and much as I like matzoh there comes a point when I get pouty.  My husband David, who is not Jewish despite the fact that he looks more Jewish than I do, occasionally eats a piece of toast while I stare at him in despair.  In his defense, it's probably not much fun for him either.

At this point during Passover, the humble potato becomes a lifesaver.  It's carbalicious, it's warm and satisfying, and it can be made into many different incarnations over the holiday.  Mashed potatoes.  Home fries.  Baked potatoes.  The list goes on.

I am not an enormous fan of potato gratin, or scalloped potatoes, but I recently bought David a copy of Alice Waters' new book.  We knew our seder was going to be of the dairy variety due to the high number of vegetarians, so I found myself looking at dairy-heavy vegetable dishes when I came across this one.

This may be the potato gratin that changes your opinions about potato gratins.  Delicately flavored with bay leaves and fresh thyme, it is creamy but not heavy.  Unlike a lot of potato gratins, there is no cheese, just a combination of milk and cream.

And, if you use a mandoline or food processor to slice the potatoes, it goes together fast.  I had intended to do a delicate overlapping layering of the potato slices, but with fourteen people coming in the door as we were finishing the preparations, it wasn't quite that artistic.  It also accounts for the distinct lack of photos.

This recipe easily doubles.  I recommend you make it immediately before it goes into the oven so the potato slices don't discolor;  you could make the potato slices ahead of time, but Waters warns against putting them in water because the potato starch will be lost.

Alice Waters' Potato Gratin
Adapted from In the Green Kitchen by Alice Waters

2 tbsp. butter, cubed, plus more for buttering the dish
1 1/4 cups heavy cream
1 cup 2% milk
1 tbsp. kosher salt
3/4 cup vegetable stock
2 bay leaves
3 1/2 lbs. Yukon Gold potatoes, peeled
1 tbsp. fresh thyme, chopped
Fresh-ground black pepper

Preheat the oven to 375 degrees.  In a medium saucepan over medium heat, combine the milk, cream, bay leaves, salt and vegetable stock.  Heat the mixture to a simmer;  when it reaches a simmer, reduce the heat to low.

Butter a shallow, medium-sized gratin dish or casserole and set aside.  Slice the potatoes to approximately 1/8 inch thick using either a mandoline or food processor.  Immediately begin layering the potatoes into the casserole, ideally overlapping them.  However, if fourteen people are showing up at your door imminently, throw those potatoes into the dish to the best of your ability.

When the potatoes are in the dish, turn off the heat on the cream mixture and remove the bay leaves.  Pour the warm mixture over the potatoes, stopping just before it gets to the top of the potato slices.  If you overfill, it will spill over in your oven--I can attest to that.

Sprinkle the cubes of butter evenly over the gratin, then cover the pan with foil.  Bake for 35 to 40 minutes;  check to make sure the potatoes can be pierced with a knife.  Then remove the foil, sprinkle the thyme and pepper over the potatoes, increase the heat to 400 degrees and bake for another 25 to 30 minutes, until the potatoes are lightly browned.

At this point, there will be quite a lot of cream in the bottom of the dish.  The dish can be served immediately, or you can let it rest for another 5 to 10 minutes to allow some of the remaining cream to absorb.

Easily serves 8 as a side dish.

Monday, April 9, 2012

And Chaos Ensued

David and I are still cleaning up the kitchen after last night's Passover seder/blowout.  We had our first one two years ago with about six people, last year increased to about eight and this year went full throttle with a crowd of fourteen that included three children and one person that neither of us had previously met (though she was lovely). 

Despite all the careful planning, there were things we had forgotten, like the hand-washing bowl that is a part of the seder.  While dinner was in the oven, the delicious potato casserole boiled over and caused smoke to fill the kitchen and dining room.  We then opened the doors a little earlier than the section where you open them for Elijah--but no matter.  It was a chaotic seder, but everyone had a good time.

Last week I wrote about the challenges of preparing a delicious meal that is not only kosher for Passover (no bread, rice, beans, corn, peas or things that puff when they cook), plus suitable for the one vegan and five vegetarians that were joining us.  What do you serve under these circumstances?We settled on a dairy meal with a fish dish--for those who aren't familiar with the laws of kashrut, certain fish are considered pareve, or neutral--neither meat nor milk. 

Haroset (traditional fruit-and-nut dish that is part of the seder plate, but also delicious)
Matzoh
Herb-crusted halibut
Warm quinoa salad with vegetables
Roasted asparagus
The best scalloped potatoes ever (will be posted later this week)
Various salads and vegetables brought by friends
Gelato and chocolate-covered matzoh for dessert


This is what I get for forgetting take photos until after the meal.
We had a lot of food, and our refrigerator runneth over.  As it turned out, most of the vegetarians were of the pescetarian, a/k/a Alaska vegetarian, variety--eaters of fish but not meat.  That's just as well since David got carried away when he bought the halibut. 

This recipe originally called for salmon, but oddly salmon was selling at a premium yesterday.  It makes no sense, unless it is all the restaurants in the lower 48 buying Alaska salmon that is causing the price hike.  It worked just as well for halibut, a firm, mild white fish that needs adventurous flavors to be at its best.  I doubled the original recipe, but it can be scaled back down if you're feeding less than a crowd.

Herb-Crusted Halibut
Adapted from The Barefoot Contessa's How Easy is That? by Ina Garten

2 cups chopped mixed herbs--parsley, sage, thyme or whatever you have on hand
2 cups chopped green onions, including both the white and green parts
1/2 cup extra-virgin olive oil
4 tbsp. fresh-squeezed lemon juice
1/4 cup dry white wine
5 lb. halibut filet, skin on

Preheat the oven to 425 degrees.  While it is heating, place the halibut skin side down on a rimmed baking sheet.  In a small bowl, combine the lemon juice and olive oil, then pour evenly over the halibut--there may be a bit left over. 

Combine the herbs and green onions, then pat the mixture evenly over the fish.  Pour the wine around the edges of the halibut.

Bake for fifteen to eighteen minutes, or until the thickest part of the fish flakes easily and is opaque.  Remove the fish from the oven and cover with foil for ten minutes.

Easily serves 12 people.

Tuesday, March 20, 2012

Gluten-Free and Fabulous

Thanks to everyone for their get-well wishes for my cat, Ingrid.  The good news is--how do I put this delicately on a food blog?--she is not hopping off the bed every morning at 5:30 a.m., howling pitifully and then--er--losing the contents of her stomach on the bedroom carpet.  Was that delicate enough?  We'll know more about how she's reacting to the medication in the next couple of weeks.

Rejoining the Cake Slice bakers after a month off, I have to sing the praises of these little chocolate cakes.  Admittedly, they were supposed to be molten chocolate cakes, but even with baking according to the letter of the instructions, there was no melting going on.  Rather, I would describe these as little souffle cakes with a slightly brownie-like center.  A list of their many fine qualities:

1.  They don't contain any flour.  This is the cake to make your friends who can't eat gluten.  Or for Passover, which is coming up quicker than I care to think about. 

2.  You already have all the ingredients.  A word on chocolate:  this is not the place to use your fancy, expensive chocolate.  My fellow Cake Slice bakers warned that the original all-bittersweet recipe was, well, just too bitter.  I like dark chocolate better than anyone, but I heeded the warning and used a combination of semi-sweet Baker's chocolate and part of a big Hershey bar that for reasons that pass understanding has appeared in my pantry. 

3.  You can make the batter ahead.  I made the batter and put it in the fridge for six hours before baking up the cakes.  No problem, just bring the batter to room temperature before baking.  It'll take you that long to preheat your oven anyway.


On top of that, the cakes were delicious, and not too sweet.  I served them with a side of honey gelato, the recipe for which will appear later this week.  Good vanilla ice cream would work just as well. 

This recipe can be easily doubled;  I cut it down because it was just for David and I.  We ate the leftover cake the next morning and it was more brownie-like, but equally delicious.

Individual Warm Chocolate Cakes
Adapted from The Cake Book by Tish Boyle

3 ounces semi-sweet chocolate, chopped
1.5 ounces milk chocolate, chopped
2 tbsp. unsalted butter, cubed
1/4 cup sugar
2 large eggs, separated
1/16 tsp. salt (basically just a pinch)
1/8 tsp. cream of tartar

Spray three six-ounce ramekins (or coffee cups, in my case) with baking spray with flour or butter them generously;  set aside.

Preheat the oven to 375 degrees.  Using a double boiler, melt the chocolate and butter over simmering water.  When the mixture is completely melted, remove from the heat.  Whisk in half the sugar, then the egg yolks.

In a small bowl, beat the egg whites and salt with an electric mixer.  When the whites are foamy, add the cream of tartar and beat at medium speed until the whites are at the soft-peak stage.  Then add the remaining sugar and beat the whites to stiff peaks.

Fold a third of the whites mixture into the chocolate until combined, then incorporate the rest of the whites bit by bit. 

Divide the mixture among the prepared ramekins/cups and place them on a baking sheet.  Bake for approximately 15 minutes, until the tops start to crack.  Watch closely because overbaking will mean no molten center.

Cool the cakes for a minute on the baking sheet, then run a knife around the edges to unmold.  Unmold immediately on the serving plate and garnish with powdered sugar and ice cream.

Makes three individual cakes.

Tuesday, March 13, 2012

Tea and Strumpets

Sunday morning dawned clear and cold, with the rare appearance of the Alaska sun.

Despite the dreaded "spring forward" time change, I leapt out of bed and ran downstairs to start baking.

The occasion?  Tea and strumpets.

Yes, you read that right.  I do not mean tea and crumpets.  My friend Arlitia was holding a small tea party for a pretty kick-ass group of women at her house that morning.  Her tea selection was startling:

I wish I could tell you I tried the red velvet chocolate variety, but I didn't.  Everyone brought tea-type food, and Arlitia made three incredible varieties of scones, and several types of tea sandwiches.

She lives in the area of Anchorage called the Hillside, which is built up into the mountains just before you leave Anchorage on the Seward Highway.  You could see the water of Turnagain Arm and higher up into the mountains.  On a clear day, it's a spectacular view.

 
It's been a chaotic couple of weeks, so it was awesome to sit down with some friends and catch up for a few hours.  I don't know if I've said that I'm midway through production on another directing project, the gorgeous but complicated play Eleemosynary.  As of last weekend, I'm also designing the sound.  More on that in the next post, but in the interim, my contribution to the tea party:
 
I'm sure most bakers have a decorative mini bundt pan, which probably never gets used.  Or, at least, mine are almost never used, because I have two:  one shaped like rosettes and one shaped like maple leaves.  I used both to make miniature tea cakes, because portion-sized desserts are the only way to go for a tea that started at 11 a.m.  You may feel guilty carving into a full-size cake at that hour, but it's no big deal to pick up a mini-cake.


This recipe also makes one full-size bundt cake, although it will require a longer baking time. 

Chocolate-Hazelnut Tea Cakes
Adapted from All Cakes Considered by Melissa Gray

3 1/2 sticks salted butter (yes, you read that right), at room temperature
1 1/2 cups granulated sugar
6 large eggs
2 cups powdered sugar
2 1/4 cups all-purpose flour
3/4 dark unsweetened cocoa
1 cup chopped hazelnuts

Powdered sugar for garnish, if desired

Prepare two mini-bundt pans with baking spray with flour, making sure to coat all the details in the pan with spray.  Preheat the oven to 350 degrees.

Cream the butter using a hand mixer on medium speed, gradually adding the granulated sugar.  The mixture will be pale yellow and fluffy.  Add the eggs one at a time, beating well after each one. 

Slowly add the powdered sugar, and beat until just blended.  Set the mixer aside and incorporate the cocoa and flour by hand using a wooden spoon.  Stir in the chopped hazelnuts.

Dollop the batter into the pans--it will be thick and sticky.  Try to smooth the batter;  you will likely end up with "crowns" on the cakes that will need to be trimmed.

Bake for approximately 40 minutes, or until a tester comes out clean.  Cool the pans on a baking rack for half an hour;  then tip the pans over to unmold.  Cool for another 20 minutes or so;  dust with powdered sugar if desired.


Makes approximately 24 tea cakes, depending on the size of your pans.